This is the second of the 3 parts of Fancy's Hackamore, and I am again up against a wall. You'd think a plain tied-brow headstall would be simple! The phrase "in as much detail as I could manage" again translates to: some parts will get more detailed descriptions than others. Which ones depends on my photography (haphazard), my skills at describing (chancy), and my wishes to save something for later. Not only is some of this model tackmaking quite difficult, some of these steps are near-impossible to depict in any format. Only personal experience will show you everything that went into it.
Having said that, once more I am amazed at how much is here.
These pictures show a "holder" bosal, a plain sinew one (that was used for the Guide). It is NOT the one Fancy's Hackamore winds up with, nor is it anything like the original 2005 one. That bosal will be the subject of the last post in the series. So hang on! This chapter is all about the headstall.
Simple, remember? What we see here are all the leather lace parts involved. From top to bottom: crown strap, off cheekstrap, near cheekstrap, and two throatlatches (mass production is lucrative). The buckles were made, as are all important headgear ones at the TSII, out of handtwisted stainless steel wire. I use 26 ga. doubled. They slide beautifully and they don't corrode. Fixing the ends (to a double-looped S buckle) requires a deal of fiddling, as you have to secure each wire separately. That's 4 wire ends per buckle. You'd better have a trusty pair of pliers; it's always right on the edge of what I can manage to do, to fold over such tiny ends and bend them down so they don't snag. If the twisted-wire is not untwisted at the fold points, and separately secured (as two wires, side by side), it bulks up too large.
Fancy's Hackamore features braided-button-and-slit fastenings on the cheekstraps. This exact method was only invented a month earlier, on Grieve's Roper, June of 2005 (yeeks, I didn't know that!! looked it up just now)(so Fancy's is important yet again!), after many variations over the previous 5 years, going back to 2001. Oh the chapters I could write on this - !! -- someday!! Button-and-slit solved a bazillion problems. It could be opened, thus making bit exchange possible (though only by the nimble fingered); it looked suitably Old West and realistic; it blended beautifully with braidwork; it saved space; and it was relatively easy for me to make, rendering it repeatable. Repeatable and thoroughly TSII: having finally evolved into the sweet spot of perfection, it remains our standard bit-to-cheek fastening today. I've used it for the past 10 years and hope to always.
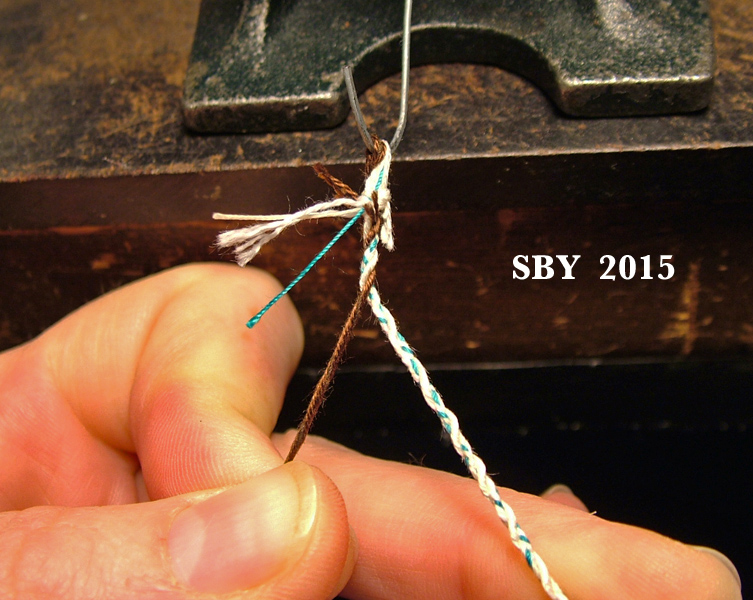
Basically it is 4 heavy threads tied in two Crowns and a Wall: Undercrown, Overcrown, Wall. The threads are fed through 2 small needle-chiseled slits about 5mm apart.
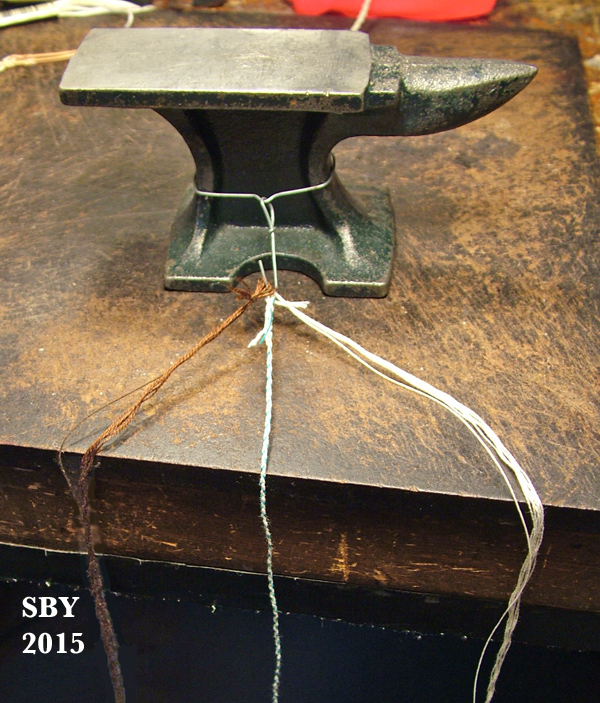
A smidgeon (about 4 passes) of 4-strand braid is necessary to provide a kind of neck. I did that part with a hemostat holding everything together, hung off the braiding anchor.
No, that button, technically an end knot, doesn't have to be perfect. It usually isn't. The trick is 2 Undercrowns, and to do the button before the slit. That way you know where to put the slit.
Fingernails really help. And Fray-Chek : ) without which my model tack would not last half so well. Once set, button-and-slit will not budge, another benefit.
Now we bound ahead, to the decoration of the headstall. Fancy's design was unique, even though I'd been doing flat braiding since 1995.
There was nothing really new in the buttons themselves, Spanish Ring Knots (3P5B) and Pineapples with single Interweaves (5P4B with 1 IW), nor even their colors, turquoise, white and dark brown. I had used this combination on Malaguena's back in 1995 and it was a roaring success. What was new with Fancy's was the arrangement of the contrasts: realizing that the dark brown and the turquoise were equal in terms of intensity, and simpy swapping them across the IWs and the edge SRKs.
I don't know where this idea came from. Nothing quite like it is in evidence in all my previous 10 years of model braidwork, across dozens of pieces. It's part of the magic of Fancy's Hackamore, I guess.
No pictures were taken of me setting the silver beads. The lace is split in place, with a needle chisel, and the beads are set on one by one. They are opened by mashing them end-down on the blunt awl, then closed with the needlenose pliers. Careful work is needed to smoothe down any raised edges, so as not to scratch, and to set the edges on the inside, where they don't show. As I was setting them, 10-year-old memories arose, telling me to cut and file some of them smaller (the round beads), to fit the smaller gauge of leather. These silver beads were obtained at the Gem Show in Tucson, as necklace makings. Their origin is overseas.
The idea of using Hill Tribes Silver miniature beads in parallel rows would be used again in 2007, with Jennifer Buxton's Green Braided Set:
Yes, it is real silver, because it tarnishes.
On to the browband tassels.
Making tassels is described in the Guide... and we've already covered it in the mecates for Fancy's. But here goes again. Six strands of dental floss are fed through the slit holes,
then waxed thread is fed through the slits once,
to help prevent slide-off. Two half hitches are tied to hold the floss in position. Using this tied thread as a core, a Pineapple with 1 ring IW in self is braided on.
The clamp holds the other half of the browband out of the way.
The interweave rings are put on in turquoise heavy thread, using a blunt needle.
It is pretty slippery, so care is needed to prevent the braided button sliding right off. Tighten and finish. Wah--hooh, the browband is done. Assemble the headstall and enjoy!
The throatlatch is extra long, partly because the original Fancy's was, and partly so folks can cut it to their own preference. I tuck the end up into the headstall and browband rather than cut it short, but that's personal usage.
In other news: BreyerFest was a whopping success!! Thank you Erin: it's a fabulous saddle and I love it!! Thank you Heather, Ann and Eleanor: every minute was wonderful. Thank you Heather Wells for the BHR Buffalo; now I'm gonna have to post something on him. He brings my Buffalo Conga up to 10. And I finally sold my Matinee Idol, featured on this blog (August 2014). Kudos to all the newcomers - may your horses bring you great joy!
My Quelle Surprise was the matte Appy. I would trade him for a glossy Appy, if there are any out there willing. I had originally wanted the Perlino but find myself changing my mind as the Appy grows on me. My Ganache is up for trade for a Haute Couture. Perhaps I can come up with something extra to make this deal more attractive.
Thanks to everyone for offering on Fancy's Hackamore! and to those patiently waiting, still, for me to finish the last 2 Lottery winners...
Tuesday, July 28, 2015
Tuesday, July 7, 2015
Fancy II: Mecate: Part 2
It is more of a challenge than I thought to depict every step in the making of these mecates (and these hackamores). I confess some steps are going to be skipped. Some of them are too difficult and complex to portray in anything like 20 pictures or with my camera, which takes at least one hand to hold. Some of them are waiting for the next book, itself a difficult, long term and complex subject. And some of them... well... despite my best intentions, I'm just not ready to share.
Having said that, I'm amazing myself with how much IS being shared here! We have already covered the ingredients of a model mecate in great depth; now for combining the parts! In this first shot, the three parts are hung on the braiding anchor hook.
The idea is to spin them into a triple-twist rope. My procedure is to combine two parts for about 4 to 5 inches, and then bring in the third. The spin of the whole is to the left, around an invisible centerline, so the twist of each of the three parts (strands) is to the right individually.
(Pardon the lighting; this shot was taken too dark.) No machines are used in the spinning. I twist and spin entirely by hand, trying to achieve a consistent tension, neither too tight nor too loose. Fingers must be very clean to get a good grip, so I'm constantly wetting and wiping them.
This above shows the third strand coming in, after the first two are together for a few inches. The spinning is around an invisible centerline. If the blue and white are too tight, they are loosened to allow the brown to slip into place. You know when the spinning is right because the strands will hold themselves together in place if let go.
A trick I use is to alternate which two colors (strands) I first blend. This is to even out any errors (and believe me, there are errors!). I have noticed with my hand twisting that I overtwist each strand, and they unspin when I let go. But I can't get the tension I want any other way. I twist tightly (to the right), right before each strand goes into place, and somehow it works.
Naturally, the ends didn't come out even! In this case the blue-braided (checkered) strand was the shortest.
Time for a correction. In my last blog I indicated that 3'2" was too short, by saying "O.K., Fancy's original mecate was a bit short..." By the numbers, one-ninth of a twenty-two foot mecate would be 29.3 inches. Far from being too short, 3'2" is nine inches too long. We'll have to see how much is used up with tying on the quirt and the tassel...
Here I'm doing the quirt end first, for ease: the tassel end is definitely harder! Notice the silver beads and the pre-made quirt with its braided ring. I've tied a thread around the mecate to keep it from unravelling. As it happens, the thread is untied and retied around everything once it's through the ring --! and will later be removed.
The trick here is to spin in the ends: to open the twist and allow it to 'grab' them, and blend them in.
The silver bead acts as a crimp. We know from historical photos there were two beads to Fancy's original. The scissors clip off the thread ends, right at the second bead. And the quirt is on.
Next is the tassel end. This is a lot more work. An end knot must be formed, a horsehair tassel installed, and then the end knot covered with a braided button. And then another silver bead goes on. My way of making tassels is described in the Guide, but I haven't said anything about end knots. Here goes! In the case of this mecate with its three parts, a classic Crown-&-Wall is used.
The Crown is the first part of the two-step process. Each strand goes over and under.
A Wall is the second. At this point, I like to remember famous words from Mark Twain's renown book Tom Sawyer: "Under the Cross!" Each strand is worked back around and up through the center, "under the cross" formed by the other two colors to its left. This shot shows the white strand threaded on the needle, about to be drawn up through the center.
When finished, the end knot is tightened. If it's done right, a three-strand-braid pattern shows around the edge (rim) of the end knot. If you weren't picky about the color of your tassel, you could quit right here.
But I want a white horsehair tassel. The time to put it in is before any buttons are braided over the end knot.
As I've proudly told my dentist, the best miniature white horsehair in the world is made from dental floss. : ) The unwaxed, shreddiest kind! These pictures show a 6 tassel, made from 2 x 3 strands of dental floss; in fact, I later added a doubling (2) to make the tassel an 8. Eight (8 pieces of floss) is perfectly in scale for most Trad mecate tassels (and many other tassels, may I add).
The procedure is to thread a sharp needle with three lengths of dental floss. You want to minimize drag through the middle of the end knot, hence the folding and going twice through the needle's eye (shown above). The needle pierces up through the end knot, (in amoungst all those threads), then crosswise through the mecate body and then back down from another location, emerging at the same spot. Below we see the needle just starting to pierce back down.
Pull the floss down snug. Clip any loops, to free the needle. Everything's upside down in this shot, but this is what it looks like now:
And now we start clipping again, very carefully. A few at a time, remove the threads, but not the floss! Believe it or not, they won't unravel. Friction makes good glue at this scale. The picture shows just one thread to go.
A few strokes with the dull awl will fluff it out. I find that natural wear does the same job. Of course, I have Fray-Chek'd the end knot.
Voila: horsehair tassel.
But don't trim it just yet. You need that length to hold on to during any braiding of buttons. This being a TSII mecate, it's gonna have a braided button. : ) Here is where I'm invoking previous statements. To fully cover miniature braiding would take a book. I refer to earlier blog posts, such as A Very Long Button: Tightening and A Very Long Button: Finishing. Braiding is covered in any number of books; that's how I learned it. Don't despair; the way this blog is going, I'll be covering this subject before all is said and done.
This button is a 7P 6B with two rings of Interweave. It was done in self color, that is, all one color: rawhide heavy thread.
As of this writing, both mecates are done. The second one, on the left, is an inch shorter.
As of this posting, we're at work on the headstalls. Maybe I can squeeze in the bosals during BreyerFest. Look for this project underway in Room 610 of the CHIN!!! I'm hoping the second hackamore can be auctioned off to the highest bidder.
See you at BreyerFest!
Having said that, I'm amazing myself with how much IS being shared here! We have already covered the ingredients of a model mecate in great depth; now for combining the parts! In this first shot, the three parts are hung on the braiding anchor hook.
The idea is to spin them into a triple-twist rope. My procedure is to combine two parts for about 4 to 5 inches, and then bring in the third. The spin of the whole is to the left, around an invisible centerline, so the twist of each of the three parts (strands) is to the right individually.
(Pardon the lighting; this shot was taken too dark.) No machines are used in the spinning. I twist and spin entirely by hand, trying to achieve a consistent tension, neither too tight nor too loose. Fingers must be very clean to get a good grip, so I'm constantly wetting and wiping them.
This above shows the third strand coming in, after the first two are together for a few inches. The spinning is around an invisible centerline. If the blue and white are too tight, they are loosened to allow the brown to slip into place. You know when the spinning is right because the strands will hold themselves together in place if let go.
A trick I use is to alternate which two colors (strands) I first blend. This is to even out any errors (and believe me, there are errors!). I have noticed with my hand twisting that I overtwist each strand, and they unspin when I let go. But I can't get the tension I want any other way. I twist tightly (to the right), right before each strand goes into place, and somehow it works.
Naturally, the ends didn't come out even! In this case the blue-braided (checkered) strand was the shortest.
Time for a correction. In my last blog I indicated that 3'2" was too short, by saying "O.K., Fancy's original mecate was a bit short..." By the numbers, one-ninth of a twenty-two foot mecate would be 29.3 inches. Far from being too short, 3'2" is nine inches too long. We'll have to see how much is used up with tying on the quirt and the tassel...
Here I'm doing the quirt end first, for ease: the tassel end is definitely harder! Notice the silver beads and the pre-made quirt with its braided ring. I've tied a thread around the mecate to keep it from unravelling. As it happens, the thread is untied and retied around everything once it's through the ring --! and will later be removed.
The trick here is to spin in the ends: to open the twist and allow it to 'grab' them, and blend them in.
The silver bead acts as a crimp. We know from historical photos there were two beads to Fancy's original. The scissors clip off the thread ends, right at the second bead. And the quirt is on.
Next is the tassel end. This is a lot more work. An end knot must be formed, a horsehair tassel installed, and then the end knot covered with a braided button. And then another silver bead goes on. My way of making tassels is described in the Guide, but I haven't said anything about end knots. Here goes! In the case of this mecate with its three parts, a classic Crown-&-Wall is used.
The Crown is the first part of the two-step process. Each strand goes over and under.
A Wall is the second. At this point, I like to remember famous words from Mark Twain's renown book Tom Sawyer: "Under the Cross!" Each strand is worked back around and up through the center, "under the cross" formed by the other two colors to its left. This shot shows the white strand threaded on the needle, about to be drawn up through the center.
When finished, the end knot is tightened. If it's done right, a three-strand-braid pattern shows around the edge (rim) of the end knot. If you weren't picky about the color of your tassel, you could quit right here.
But I want a white horsehair tassel. The time to put it in is before any buttons are braided over the end knot.
As I've proudly told my dentist, the best miniature white horsehair in the world is made from dental floss. : ) The unwaxed, shreddiest kind! These pictures show a 6 tassel, made from 2 x 3 strands of dental floss; in fact, I later added a doubling (2) to make the tassel an 8. Eight (8 pieces of floss) is perfectly in scale for most Trad mecate tassels (and many other tassels, may I add).
The procedure is to thread a sharp needle with three lengths of dental floss. You want to minimize drag through the middle of the end knot, hence the folding and going twice through the needle's eye (shown above). The needle pierces up through the end knot, (in amoungst all those threads), then crosswise through the mecate body and then back down from another location, emerging at the same spot. Below we see the needle just starting to pierce back down.
Pull the floss down snug. Clip any loops, to free the needle. Everything's upside down in this shot, but this is what it looks like now:
And now we start clipping again, very carefully. A few at a time, remove the threads, but not the floss! Believe it or not, they won't unravel. Friction makes good glue at this scale. The picture shows just one thread to go.
A few strokes with the dull awl will fluff it out. I find that natural wear does the same job. Of course, I have Fray-Chek'd the end knot.
Voila: horsehair tassel.
But don't trim it just yet. You need that length to hold on to during any braiding of buttons. This being a TSII mecate, it's gonna have a braided button. : ) Here is where I'm invoking previous statements. To fully cover miniature braiding would take a book. I refer to earlier blog posts, such as A Very Long Button: Tightening and A Very Long Button: Finishing. Braiding is covered in any number of books; that's how I learned it. Don't despair; the way this blog is going, I'll be covering this subject before all is said and done.
This button is a 7P 6B with two rings of Interweave. It was done in self color, that is, all one color: rawhide heavy thread.
As of this writing, both mecates are done. The second one, on the left, is an inch shorter.
As of this posting, we're at work on the headstalls. Maybe I can squeeze in the bosals during BreyerFest. Look for this project underway in Room 610 of the CHIN!!! I'm hoping the second hackamore can be auctioned off to the highest bidder.
See you at BreyerFest!
Sunday, June 28, 2015
Fancy II: Mecate: Part I
The making of Fancy's Hackamore II 's mecate naturally divides itself into two parts, the CO part and the PA part. This is the basement of my Colorado house. (It is, in fact, the exact spot in all the Earth where I started making model horse tack, back in circa 1973.)(If you look at my 2014 Winter Photo Challenge opening shot you will glimpse the back wall.) I had thought to make one post for one mecate, but things expanded (almost 40 pix!), and I've decided to take advantage of this division. Of course, this is a sub-division of the divison of the hackamore itself. Hackamores consist of three parts: Mecate, Headstall and Bosal. Bear with me: it will eventually all come together!
I'm starting with the mecate because it's the easiest of the three. (Whether I'll actually have time to complete this hackamore before BreyerFest, let alone have a second on hand to sell, remains to be seen! But I'm having great fun.) Things don't always go as planned, do they? While in Colorado my tackshop reached this state of being:
It looks grand, but it was destined not to produce anything beyond parts for one mecate. Other actors took center stage -- one of them was our car -- and my time, always limited by acting as hinge-pin for 3 people with vastly different goals, became more limited. The computer stole further time by being so dern interesting and addictive, but I won't go into that... : )
... This post isn't about the perfected miniature of a real mecate, such as my skill can now encompass. It's about replacing what was lost, reproducing Fancy's Hackamore's mecate, and that means going back 10 years and doing what I did then, in 2005. I dug out the N.A. notebooks (my tack bench notebooks) that covered those 3 long-ago hackamores.
See the date at the upper left: 0507.18 (July 18, 2005). From internal evidence I know the second of the 3 was the one I kept; it was originally meant to be sold, hence the "2nd Sales Hackamore" title. We have the mecate ingredient list on an earlier page: "braided-thread strand (1 turq., 1 banana & 1 crochet yarn), 1 emb. floss + 1 thread (off white); and 1 emb. floss + 1 thread dk. brown."
At the time (2005), spinning as opposed to braiding was marvelous and fresh for me (I had learned it in 2000), but I was still incorporating braided-thread elements in my mecates. Partly this was from a long history of braided model mecates (all the way back to the early 1980s), and partly it was because braided-thread just looks so good and works so well for so many model horse tack applications. I'd had the idea to use it for the checkered (flecked) strand of the typical horsehair mecate, and this looked lovely.
The hook is a piece of wire fastened to my Orange Tackle Box front closure. Lacking crochet thread (Aunt Lydia's at home), I borrowed some "Meltler" from Mom (the large white spool), and peeled it to 2/3rds. This turned out to be very close in size to crochet.
Somehow things always go funny. The ends did not come out together at all:
I thought I'd started with 4' of each, but that turquoise thread clearly had other ideas. Finished length, 3'2". O.K., Fancy's original mecate was a bit short...
I did want to make a second piece. This time I indulged in a bit of improved tech. The next braided-thread used 4 threads. The bulk is very nearly the same.
It too came out at 3' 2" !!
Now for the quirts. Full scale mecates do sometimes have a little leather lash at the non-tassel end (the tail end), but they do not have rings -- something I wouldn't learn for another few years. Ah, well, Fancy's had a braided ring...
While it is not in the scope of this post to teach ring-braiding (that's for the next book), I want to share that soldering those rings took the most effort and was the biggest adventure of my tackmaking time in Colorado. I ran through several ideas when I realized I'd goofed and not brought any pre-soldered rings: cutting the end off an Aluminum tube was one. When I finally submitted to searching out Dad's soldering tools and setting up and doing it... the rings wouldn't solder. Frustration extreme. In the end (I wasn't timing but it felt like hours) I tumbled to the fact that one cannot solder stainless steel. DUHH!!!!! I didn't have brass or galvanized rings, only a small selection of emergency hardware, because normally I make my own rings from stainless. So that is how these two mecates came to rings of Gold Filled Brass... that's all I had of the right size that would solder. : )
Even in so simple an act as slit braiding, there are lessons to be learned.
If you cut the slits like this, the ends wind up uneven.
Why? Because you didn't stagger the slits and allow for their slight difference in distance from the ring. A better way is to cut each slit after the passing-through.
Also, I'd forgotten to bevel the edges, something I almost certainly would've done. It's something I've been doing for thirty years. (Note bevelling is done with two hands, but I had to hold the camera.)
Fancy's had two sets of slit-braid on the quirt. Some call this a bleed knot.
Even here, the ends don't match!
We are well and truly on the way to two separate and distinguishable mecates.
This is all I was able to manage over a number of weeks, from that incredible and so-beautifully packed-up tack shop. I hadn't even brought heavy brown thread, so I made my own out of lighter-gauge thread. (I very much enjoy spinning thread by hand, useful for miniature mecate-making.)
All I can say is it really looks like I'm not meant to make tack on trips, no matter how I want to. Attending to car matters was the excuse this time; every weekend we went out of state (WY or NM), and nearly every evening was a chauffered picnic, catered by you-know-who. Talks with parents, birdwatching (we got Golden Eagles!), a LOT of piano playing with Mom, strolls before bed: all these were more important. So be it. I enjoyed them all very much (except maybe the car).
Next chapter will be the spinning of the mecate. As of this writing it is finished.
I'm starting with the mecate because it's the easiest of the three. (Whether I'll actually have time to complete this hackamore before BreyerFest, let alone have a second on hand to sell, remains to be seen! But I'm having great fun.) Things don't always go as planned, do they? While in Colorado my tackshop reached this state of being:
It looks grand, but it was destined not to produce anything beyond parts for one mecate. Other actors took center stage -- one of them was our car -- and my time, always limited by acting as hinge-pin for 3 people with vastly different goals, became more limited. The computer stole further time by being so dern interesting and addictive, but I won't go into that... : )
... This post isn't about the perfected miniature of a real mecate, such as my skill can now encompass. It's about replacing what was lost, reproducing Fancy's Hackamore's mecate, and that means going back 10 years and doing what I did then, in 2005. I dug out the N.A. notebooks (my tack bench notebooks) that covered those 3 long-ago hackamores.
See the date at the upper left: 0507.18 (July 18, 2005). From internal evidence I know the second of the 3 was the one I kept; it was originally meant to be sold, hence the "2nd Sales Hackamore" title. We have the mecate ingredient list on an earlier page: "braided-thread strand (1 turq., 1 banana & 1 crochet yarn), 1 emb. floss + 1 thread (off white); and 1 emb. floss + 1 thread dk. brown."
At the time (2005), spinning as opposed to braiding was marvelous and fresh for me (I had learned it in 2000), but I was still incorporating braided-thread elements in my mecates. Partly this was from a long history of braided model mecates (all the way back to the early 1980s), and partly it was because braided-thread just looks so good and works so well for so many model horse tack applications. I'd had the idea to use it for the checkered (flecked) strand of the typical horsehair mecate, and this looked lovely.
The hook is a piece of wire fastened to my Orange Tackle Box front closure. Lacking crochet thread (Aunt Lydia's at home), I borrowed some "Meltler" from Mom (the large white spool), and peeled it to 2/3rds. This turned out to be very close in size to crochet.
Somehow things always go funny. The ends did not come out together at all:
I thought I'd started with 4' of each, but that turquoise thread clearly had other ideas. Finished length, 3'2". O.K., Fancy's original mecate was a bit short...
I did want to make a second piece. This time I indulged in a bit of improved tech. The next braided-thread used 4 threads. The bulk is very nearly the same.
It too came out at 3' 2" !!
Now for the quirts. Full scale mecates do sometimes have a little leather lash at the non-tassel end (the tail end), but they do not have rings -- something I wouldn't learn for another few years. Ah, well, Fancy's had a braided ring...
While it is not in the scope of this post to teach ring-braiding (that's for the next book), I want to share that soldering those rings took the most effort and was the biggest adventure of my tackmaking time in Colorado. I ran through several ideas when I realized I'd goofed and not brought any pre-soldered rings: cutting the end off an Aluminum tube was one. When I finally submitted to searching out Dad's soldering tools and setting up and doing it... the rings wouldn't solder. Frustration extreme. In the end (I wasn't timing but it felt like hours) I tumbled to the fact that one cannot solder stainless steel. DUHH!!!!! I didn't have brass or galvanized rings, only a small selection of emergency hardware, because normally I make my own rings from stainless. So that is how these two mecates came to rings of Gold Filled Brass... that's all I had of the right size that would solder. : )
Even in so simple an act as slit braiding, there are lessons to be learned.
If you cut the slits like this, the ends wind up uneven.
Why? Because you didn't stagger the slits and allow for their slight difference in distance from the ring. A better way is to cut each slit after the passing-through.
Also, I'd forgotten to bevel the edges, something I almost certainly would've done. It's something I've been doing for thirty years. (Note bevelling is done with two hands, but I had to hold the camera.)
Fancy's had two sets of slit-braid on the quirt. Some call this a bleed knot.
Even here, the ends don't match!
We are well and truly on the way to two separate and distinguishable mecates.
This is all I was able to manage over a number of weeks, from that incredible and so-beautifully packed-up tack shop. I hadn't even brought heavy brown thread, so I made my own out of lighter-gauge thread. (I very much enjoy spinning thread by hand, useful for miniature mecate-making.)
All I can say is it really looks like I'm not meant to make tack on trips, no matter how I want to. Attending to car matters was the excuse this time; every weekend we went out of state (WY or NM), and nearly every evening was a chauffered picnic, catered by you-know-who. Talks with parents, birdwatching (we got Golden Eagles!), a LOT of piano playing with Mom, strolls before bed: all these were more important. So be it. I enjoyed them all very much (except maybe the car).
Next chapter will be the spinning of the mecate. As of this writing it is finished.
Subscribe to:
Posts (Atom)