Sunday, February 27, 2022

Visions of Coney Eye


I'd no idea I could have so much pure, glorious, untainted fun while busting a deadline!  I did, however, have some idea that I preferred digital painting to the real thing.  This post shows what I finally am brave enough to share:  the vision my Muse has of Ziggy Stardust, and the current incarnation of that vision.

I named him Coney Eye.  Coney for the historic peninsula, with all its carousel and ragtime associations; and the "I" for island, for myself and for the London Eye, a  great ferris wheel.  I got this inspiring and incredible sculpture straight from the hand of the creator, Laura Rock Smith, in 2019 at BreyerFest.  Even then my mind was working towards his coloring.  I had grown up deeply influenced by Elitch's Gardens in Denver.

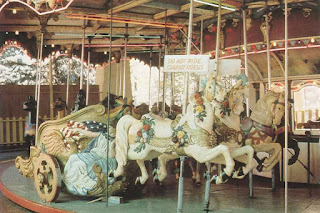
Image found online, unable to credit
(Note that this picture shows the Chariot Horses as they were many years ago, before their current painting.)

Finally ready to tackle this horse, I knew from the start I wanted a gold mane and tail.  The rest would be like Paint-By-Number!  When I sat down to digitally design him, I chose a photo by Tina DeCaussin, from last year's NaMoPaiMo, which just happened to have a gold mane and tail; and then turned the whole horse black and white.

Bit by bit, I turned him whiter and started adding in colors.
I was particularly desirous of keeping the turquoise and gold dynamic.  I wanted the fringe and tassels to be a straw blond:  to not conflict with the gold but still be yellow.

Every time I use PhotoShop I learn something new.  (Over the years PhotoShop is the computer program that has made me cry the most.)  I'd used it for decades in image processing but I'd only just begun to paint with it.  In Coney's case I discovered the Overlay option in the Artist's Brush menu.  Suddenly I had translucent color which did not obscure the carved scales.  The joy I felt when I first got that breastcollar right was beyond description.  This was it!!

I wanted the spectrum to bend in rays upwards from the center of the chest, like a wing.  That wasn't quite possible but this came close.  The hip drop followed suit much more easily.

The borders of the scaled panels, as well as the blanket and its border, would have to be neutral colors, so as not to clash with that fantastic rainbow.

I added gold hooves and put in some texture to the fringe.  (I've since changed my mind about the blanket lines; they should be gold, I just haven't done it yet.)  I was insanely proud.  I shared him with Laura, Tina and a few friends, who all reacted positively.  I wondered why I hadn't entered coloring contests under Digital.  And time went by.

February was a landmark in our lives.  Retirement, pension, banking and insurance matters consumed us both.  The fall of 2021 had brought this monumental decision, for both public and private reasons, and winter was spent in preparation.  January and February both went into making decisions we must live with for the rest of our lives.  Against this backdrop, painting model horses fell a distinct second place.  I knew when I entered NaMoPaiMo that the odds of my finishing on time were low.  I spent most of February completing the Lead Pair harness,... (and still have another unfinished tack order!  the saddle below.)

So when I finally could paint, it was to discover I'd bitten off more than I could chew.  

Matters were not helped by the method.  Since Ambolena in 2019, Gilding the Lily , I'd fallen in love with alcohol-painting:  using rubbing alcohol as a medium with pastel powders (and PearlEx), which I created myself by scraping with a knife on various pastel sticks.  There was nothing wrong with the idea; but the tiny brushes could not apply color smoothly, nor did I know much about painted-on sealant. 

I wisely tested some gold-leafing on a medallion from Jenn Danza.  But I wasn't completely happy with how it wrinkled.  Has there ever been a perfect first test? 

I loved being able to create a color on the spot, by mixing the various pastels and PearlExes.  The borders to Coney's panels were done in red-blue interference PearlEx, which came out a lovely metallic mauve.  Photos don't do it justice.

I also started gold-leafing with the hooves and forelock,... enough to teach me that this step alone would take many days and probable re-doing.  So the remainder of Feb went to mentally adjusting to not making NaMo's deadline.

On the 23rd I painted the bottoms of his hooves, as per Braymere's blog.  What a grand idea!  You can just see one in the photo below.  I also decided to return to traditional pasteling & sealing, and did the girth that way.  This worked beautifully except for some staining around the area.

Somewhere in the last week I went to Uncle Eli's, the art supply store downtown, and purchased primary-color pastels.  My PearlEx package did not include such bright colors.  With these, the magic began.


I kept the alcohol-paste method for the fringe, as it gave the texture I wanted.  The girth proved to me I was on the right track.  Another miracle happened:  when it was time to seal after the rainbows, I cleaned off all the white areas around them with the alcohol.  (Note not the tail, since it will be gilded.)  And damn if his surface texture didn't suddenly appear like an old Park-paint carousel horse!  I had primed him, of course; but I don't know if I got down to the resin or what.  This smoothness, with a few bumps and stains from years of abuse, was exactly what I remembered from real carousel horses...

Things were progressing.  Alas for the deadline.  It was Feb. 25th.  In a burst of pure joy, I painter's-taped some parts and swung into pastelling.  I had not known I could have so much fun.  Here he is, first layer sprayed, insurance policy completed, and all summer opening out with the lifting of a two-year cloud.

Every year, NaMoPaiMo has given me a fantastic lift.  The inspiration travels through the months, and the wisdom accumulates.  I have all the jewels for this horse;  I am satisfied with my vision of him.  Now it will be up to my own discipline to see him fully born.


Thursday, February 17, 2022

20M: Harness Bodies and Traces

It may look like this part of the Twenty Mule Lead Team harness is the hardest and longest to make.  It covers the most mule!  But bodies and traces are actually the simplest and most straightforward to create.  Here's where the tackmaker gets to say, Just strapwork.  Nonetheless there are some tack tricks here with the small 1:18 scale and with the 20M itself.  The most challenging effect to get right was the trace chain sleeves; another, delightfully successful, challenge was the rivets.  I hadn't made the rivets at first because I thought they'd be too much trouble.  This post will look closely at what was built between November 2021 and January 2022.


Let's start with the crupper.  This location is somewhat reversed from my usual nose-to-tail progression, but what the heck -- the harness is easier this way.  The cruppers feature 2 handmade tongue buckles of hammered gold-filled wire, glued on to a rounded crupper body, which is really some rolled lace.  The keepers were wire rings, shaped to ovals, and hammered.  I have almost never used wire for keepers, but these were appropriate for the scale.

The backstraps acquired hip strap rings by gluing and sewing on a bit of lace with pointed ends,

 and then were buckled onto the hames in a most peculiar fashion.
I am calling this a "backwards buckle."  This odd feature -- a tongue buckle facing back along its strap, which can only be adjusted, never removed -- seems to be a favorite trick of the [full scale real life] harnessmaker who made these replica harnesses.  It occurs in other places, viz., the hip straps and the sidecheck reins.
While it took some cleverness to create and install (c'mon! admit it! it was derned hard to cut holes almost blindly and fasten the thing from beneath), one has to admit this buckle saves on materials.

The next parts to be made were the surcingles and their pockets for the trace chains.  This is a very visible and distinctive part of the Twenty Mule Team harness.  I chose to stitch the pockets as well as glue them, to themselves above and to the lace girth (belly) straps below.  There is one girth buckle on the near side of each mule.  The surcingles were not lace but tooling leather, dyed with Saddle Tan.  I kept a paper pattern once I'd evolved a size and shape I was happy with.  

The hip straps were made from the same lace (1/8" whiskey kangaroo).  They also featured backwards buckles, forming a loop at their ends.  The hipstraps held up metal chain carriers (I don't know the correct name, arrggh) which had to be big enough to embrace the trace chain and its eventual leather sleeve, but still in scale.  It was hard work making such carriers out of 22ga wire.  I hunted through all my harness catalogs but could not find a picture.  Old West harness hardware was its own thing.

I want to emphasize that all the 2021 pictures, taken in November, show a larger chain which I first used, as well as having no rivets.  The owner generously sent some smaller-gauge chain (after I complained) and what you see above was replaced.  (The link between chain and hame was some hammered stainless steel wire curled into little c-shapes then squeezed shut, very difficult to make.)  I predict the whole rest of the Twenty will have that smaller gauge of chain.  Although I measured the larger chain to scale it right, my artist's sense felt it was too big; that same sense says the smaller chain is much better.

In January 2022 several refinements happened which made the 20M Lead harnesses much more realistic and more beautiful.  The first was the chain.  The second was the rivets.  Oh I was so proud of that little trick!  Suddenly the whole harness twinkled with tiny gold flashes of light.  They look like pinheads but are not.

The [full scale] reference showed brass rivets, of course, but in model I was using matte gold ikandis (a brand name of iron-on studs).  I created tiny little gold spots by pressing on a larger ikandi with my second-smallest Hole Punch (though not enough to cut through), then using a Needle Chisel to finally cut out the tiny circles.  (I can't get them out of my Hole Punch tubes; the tubes are too jammed full of other stuff, and too long, and I can no longer unscrew them.)  Then, with a sculpting tool, I pressed a shallow hole into where I wanted the rivet to be, fitted it in and touched the hot gun to it.  Instant melt.  It is very satisfying and fun to glue-gun stuff...  ... the only hard part was manipulating such tiny spots.  I put rivets everywhere I reasonably could, a total of about 18 per mule.

The reference shows 3 rivets per surcingle pocket edge; I changed that to 2.  Not only did this save me labor and look just as good, but the pocket's 3 stitches provided a surface that only 2 rivets could be safely fitted into: between them.  The stitches themselves were dictated by scale, i.e. my needle and thread.

The final refinement, for this phase of the harness, was the trace sleeves.  I'd had a lot of time to think about them.  I still wasn't sure how to do them, but soldiered on, hoping thin handskived leather could be glued.  Ideas of sewing them quickly fell by the wayside.  In the end I stitchmarked them heavily on top of gluing whilst folding the leather over the chain; and it worked.  Of course all this had to happen after the pocket strap had been affixed to them!  Sequencing!!  The metal chain carriers had to be opened and re-closed around this larger trace.  In full scale the chains are heavy enough to hold themselves dropping down; but in model, sorry, no; they're actually very light.

The above shot shows a view surprisingly real:  The full scale people take off the Twenty Mule harnesses in just this way.  Undo the front (lower) hame strap and lift everything off the mule and his collar, keeping the traces attached to the hames.  You only have to undo three buckles:  hame strap, crupper and girth ("breast, belly & butt").  It's easy.  Victorian fire-engine teams were unharnessed this way.
At this stage the Lead Pair harnesses were swiftly closing in on their finish.  Only a few more details and they'd be done!  Reins, yes, connecting line and check rein and jerk line...  But the real challenge was those bells, something only the Lead Pair had.  The bells caused me so much trouble that they get a blog post of their own.