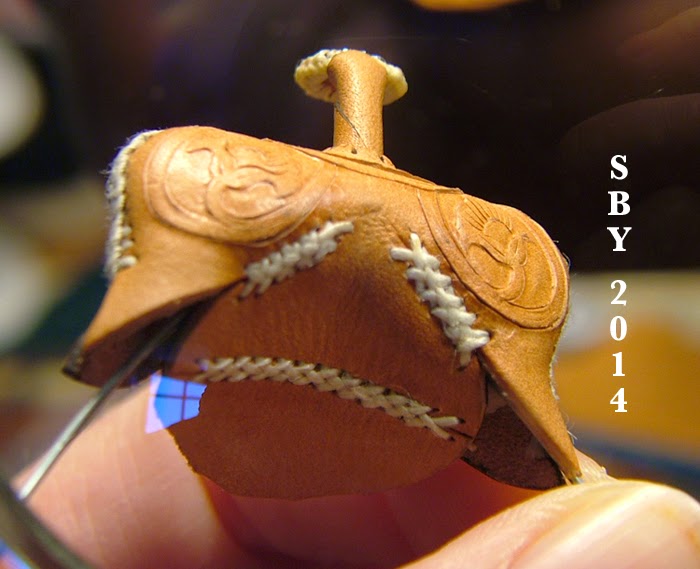
But first, let's show the normal. TSII #452's pommel is turned inside out and sewn together along both sides. This is after any tooling, decorating or dyeing.
It had been so long since I'd made a Western saddle I'd sort of forgotten how to do it! After cutting out this pommel, I decided I'd done something wrong. More leather would be needed to cover up the underside, that is, the gullet. I choose to add back on a piece, by first gluing on a splint (not visible here) and then applique-braiding the join.
This is absolutely the most work I've ever put in to redress a straight cut in leather.
The next order of business on TSII #452 was to add the gullet rim. I don't use a tree, so the front rim has to be suggested by sewing on an arc of leather. I've been doing this for years and anticipated no problems.
Had I but known it, this was one of the places where I went really wrong!! Not in the rim itself, mind you... but in the placement of it -- !!
At the same time I was starting to get uneasy about those two cuts in the back of the pommel/shoulders. Was the gullet bottom really going to be that high up? What would cover the sides, which would now be open? Did I know what I was doing? Answer: No!!
The previous applique-braid was so beautiful I decided to use it again. Here those two cuts were closed back together again.
And again, this is the MOST work I've ever done to recover from inadvertent cuts. Shoulda remembered I hadn't done cuts like those enough to really remember their need or use! I'm still evolving my pommel technique. To stop in the middle of that evolution and not pick it up again for a year or so was part of what made this saddle such a challenge.
Here we can see the "splint" on the back side of the bottom, the inside of the joining applique-braid, the underside of the gullet rim, and what happens with the horn wires. Quite a lot of information for one picture!
The next picture shows the three-strand applique used on the welt or shoulder seam of the pommel. It also shows the beginnings of my REAL problem: the rim is too low. It does not stick out forward like it should. Did I recognize this at the time? Heh!
The next picture shows my concentration on the braiding of the gullet rim. This is one of the most challenging, yet beautiful, parts of the Western pommel.
I'm afraid several steps in the making of #452's pommel did not get covered. Not shown: the inside being stuffed with Fimo and baked. This is an idea I got from another tackmaker. It solves the problem of heft, that is, strength and weight. Previously I'd used leather rolls, which tended to be hard to shape and did not lend weight.
In order to do the gullet rim braiding comfortably I went to the considerable trouble of taping the wire ends together, out of the way. This picture shows the completed braiding. It was done with a custom-made thread, 2/3rds + 2/3rds spun together, in Spanish Edge Braiding of 2 loops. This is more or less standard for me.
Whole posts might be done on this step alone. This close-up shot shows how I recovered from slant. Slant is a common enemy of edge braiding on model saddles!
What a lot of trouble for a plain braided edge! But worse was yet to come. I have said some steps did not get photographed. We have come to the point of my rant, but I don't have a picture of the destruction! I only have before and after pix. Before, the top of the gullet rim piece is below the tooled "vine" at the base of the horn. After, it is on top of the vine.
I decided the rim was too low and did not project forward properly. I had to completely remove all the front edge braiding and resew the rim. All that work... 'snif' This sort of thing happens more often than I care to admit. All told my "accident percentage" ranges from 5% to 35%, with probably an average of around 20%. The "destruction decision" is probably best made by artists confident in their ability to replace what is being destroyed. If the vision is compelling, the only difficulty should be chagrin over the destruction. My own solution is to "give it time" -- to intentionally get up and do something else for a while, and come back later, cold. At that point it is much easier to just undo everything (for me unbraiding is usually swifter than braiding) and make sure the same string can be used again. Fortunately in this case it was. A pass with the wax and we were off and running.
As often happens, amazingly, the second time around was better! The braid is more even and shows up better. The leather which covered the bottom of the pommel had to be stretched rather severely... to its limit... but there was just enough to reach.
Many times this is how it works with an evolving, one-of-a-kind piece of tack.


I learned that concept "it is not precious" from a sculpture workshop with Gwen Reardon many years ago. Sometimes it is hard to destroy your work, but I've found (just like with your saddle) that it usually comes out better in the end. I think the key is having the eye for when something is not right.
ReplyDelete