Wednesday, December 4, 2024

TSII #325 Fountain Art Deco: Finished


The pictures are going to do most of the talking!  This is another long post,...  It isn't eight horses, it's nine:  I almost forgot the original, the Classic Arab Mare, upon whom this saddle was built.  There's even a rack (stand) shot.  Having gone through them all, I find that Nicolas, or Carrizozo as he is known in my herd, is my own best overall model to display the fabulous Art Deco set.  We'll look at the "ones that fit" first, then consider some horses that shade towards too small and too big, ending with the rack.  Oh yeeks, 'the rack' sounds so bad!! --  just remember this is a saddle shop.

A close up of the marvelous fountain.  It's always hard to shoot prism tape and I don't know how I managed to be so successful here.


There is a kindness in Carrizozo's eye.  The bridle fits perfectly.  One can overlook that the cinch billet isn't quite long enough to reach the cinch's keeper.

The breastcollar doesn't pinch or choke;  the blanket isn't too big;  the reins might be a tad short, but they're workable.  As for lighting, well, blame the photographer,...

His size is neither too small nor too large.  He's so perfectly proportioned he appears as a full Traditional, yet the saddle was made for a Classic.  As a tackmaker I know he is an equal to the Pony of the Americas.  With that in mind, -- and given that I conga the P.O.A.!! -- I hauled out no less than three of them.

My first wish was to see what this saddle looked like on a cold-colored horse, i.e. a black or gray.  Answer:  Pretty cool in fact!

The black sets off the blues, while the red bits pick up on the blanket.  What looks red at the base of the fountain is actually some peach + pink holographic.

I was quietly delighted to find that this mold truly is a perfect size for #325.   The POA's long barrel is a plus for a saddle with so notable a serape and so fluffy a blanket.  The cinch billets were long enough for the keepers and the breastcollar fit snugly.  Here's another cold color, with more warm hues in the coat:

 
Finally I get to use my Kandinsky, hah!  Oh this is a good choice.
 

Continuing down the scale of Classic molds, I wondered about the Warmblod Mare, what I call the Ariat.  I have the entire Blossom series, and it was easy to choose which one to shoot.  The combination of Wedgewood blue and #325 makes for a fantastical, mystical combination, downright magical.  The purple flowers on her butt blend the two major color groups.

 
At the same time we agree that the color goes well, the saddle is getting a bit big.  Note how the neckstrap is up from the withers, into the mane.  The blanket is a little too far back, as are the skirts.  The bridle still fits.

It could be made to work.  The cinch billet is certainly long enough now!   But my next horse choice is an oh dear.  I also conga the Stock Horse Gelding, known as Liam.  And here we come to grief. 


Though the color is lovely, the size is clearly wrong.  This horse is too small.  The saddle overpowers him, the blanket is halfway to his tail!  The neckstrap is further up than on the Ariat, and the breastcollar sides push the cinch rearwards.   This is the limit;  this mold is below the proper size.  Below:  not the best angle perhaps, but it shows how far back that corona goes, well past the hips.

So let's try the other direction, a bigger horse.

See how the breastcollar is perched on the front of the shoulder, and how far out along the neck the neckstrap is?  Worse, the face ornament is too short:  It's dragging the noseband and browband inwards.

From the side you can see that the neckstrap is barely long enough for the buckle.  The breastcollar hasn't yet started to press against the throat, but it's right on the edge of doing so.

And as for the cinch, well, it's on the last couple of holes.  There's no margin of easy use here.

This next pair of photos is almost painful.  I wanted to try the set on my smallest resin which I thought could wear it.  (Sumara, sculpted by S. Prosser.)  I got an illustration of how widely varied the selection of model horses is:  this one's body is narrow enough for the saddle (and the spine perfect length), but the head is much too large.

See how the neckstrap is too far forward, and the throat is definitely being pressed.  The horse becomes larger as you progress from back to front.  The forelock was meant to accommodate tack, but this bridle is too small even for that.

This pretty version of Poker Joe was painted by Elizabeth Bouras, commission by me.  

**************************************************************************

I had almost forgotten the CAM.  Strangely, she hasn't a name.  For this month of work on the Fountain Art Deco, I'm calling her Beauty.

At long last, here we see the vision in all its original splendor.  Thirty-three years ago this is what was created, on this very model.  Only now, drawing back in the flush of completion, do I begin to acknowledge that that corona might've been a bit much.  (Too fat, too big.)  Oh yes, wrinkle grin, such blame must be laid at my door.  A good name for it would be pride,...

What a lovely portrait she makes, with such a delicate face.  Maureen's skill is still evident, even across decades of battering.


It's hard to believe I'm done.  These pictures, the photo session, are the only way I get to keep them.


Rack shot.  


Here's a couple extras.  One shows close up the repair that was done at the top of the offside serape to the 'missing network.'

And one shows the underside and inside of the bridle.  This is a unique view.  The design and work is not that complex or sophisticated.  There is an elegant simplicity about the work of the TSII from those times.   In the course of the restoration, I was able to achieve a sliding noseband on the off side but not the near;  the thread ties were too bulky.  But it's still quite adjustable, as all the photos show.

A final bonus picture.  Photography credit goes to Liz Bouras and design to Judy Renee Pope, and Paula O'Keeffe who gave the photo to me.  Hagen Renaker Roan Lady.

**************************************************************************

So, what's next for the TSII?

Fancy's Hackamore for the book, gods, time and muse willing,...


Monday, December 2, 2024

Restoring TSII #325 'Fountain Art Deco'

I am forever grateful I was allowed the time to thoroughly refurbish and restore this fascinating old piece, and learn what it had to teach me.  This post is very long and covers 3 weeks of intense work.  You just might learn something about the skill of restoring these old TSII (and other) silver tape saddles.  An earlier post on this saddle (and #402) is here.

 I started October 1 with the red-and-white corona blanket, which has its own post here.  When the corona was done, on Nov. 8, I was already working out in my mind where to start with the rest.  The job was daunting.  Replacing all hardware and missing silver tape, fastening down errant but fragile tape, fixing lost color, polishing and cleaning, oiling, and a new cinch were all indicated.  My initial estimate was two weeks.  For once (amazingly) it took only 15 days (Nov 8 to 23);  three of those days were dedicated, i.e. nothing else going on (very rare!).  One might ask why the corona took so long;  the answer is we were on the road, traveling as far as AZ, so that much of the corona work was done upon return.

There will be a second post showing the finished saddle on 8 different horses, demonstrating the range of its unusual size.

I started this seriously challenging job by focusing on one small area with easily-done fixes.  One of the pommel caps had fallen off.  Near that cap were the seat's 3 tiny silver spots, and I started replacing them with ikandis, that is, iron-on silver spots.  (Actually the first thing done was to polish the horn cap, a sterling concho handmade by Carol Williams.)  This photo shows #325 in its 'before' stage, with all circular spots still painted-silver.

The TSII used painted-silver from circa 1979 to c. 2005.  With time this material turned grey and grainy;  after several stages of intermediate silver techniques, I had fallen in love with iron-ons in 2006.  Their ease of use, long-lasting adhesive and non-tarnishing gleam has become the TSII standard.  Can you spot the improvement? (pun only partly intended):


Below, arrows point to the new spots.  The cantle spots are still painted.  Note that this shot also shows the original state of the upper off serape;  it is missing its silver tape network, and only the prism tape (color) diamonds remain.


The ikandis were one of the easiest restoration choices to make.  (I do tend to start with the easy parts!)  One merely had to hold the hot iron steady enough;  no other prep was needed.  In this shot the cantle binding is halfway through being ikandied.  For the cantle I did have to customize some spots to a smaller size.

In any restoration, conservation, repair or rebuilding of these old silver parade saddles, holding down errant silver tape is always going to be the biggest challenge.  "Errant" = lifting, flyaway, falling-off.  The silver tape adhesive tends to loosen after about 4 years if exposed to air and use.  Decades of fixing old silver tape work has taught me that it breaks most where the leather flexes the most:  at the tops of the fenders, the curves of shoulders, and the tops of serapes and bridle parts.  I knew I'd need something strong for #325's fender strip tops.  They were large enough to qualify for tying down with Mylar tinsel, a technique I call My-tying.  The arrow (below) points to the single stitch used to hold down the tape (in addition to glue).  Normally this area is hidden under the seat jockey.

The other arrow points to some corner tape which had lifted.  I treated it with Jewelry Glaze, my new trick for this saddle.

The challenge, indeed, was holding things down.  No. 325 could not qualify for My-tying everywhere.  Its design was too complex, too full of small detail and thin lines, and it had all those pieces of prism tape.  To completely disassemble the saddle and tie down every bit of tape by piercing its leather on both sides with a needle chisel was unthinkable;  all that would risk complete destruction, plus I didn't have the time.  Nor could I entirely rebuild it with ikandis;  ditto, this was a conservation job, not a total replacement.  From the beginning I believed there was only one way to logically proceed:  I had to set aside my prejudices against glues and find some kind of sealant.  I figured a thick strong clear coating would go a long way towards both replacing the missing adhesive and protecting the thin metal tape.  Call it gluing down above and below.

Wanting something beyond mod podge, I took Art Deco's Triple Thick, which I had on hand for my still-unfinished carousel resincast Ziggy (blog post here), and re-glued/painted the pommel cap and horn with it as a test.  To my great relief it worked well.  The stuff thinned wonderfully with water though I cleaned my brushes with soap at the end of each day.  The combination of adhesive and protectant was irresistible, although the glaze took longer to dry than Aleene's.  The TSII has a long track record of trying out new technologies on customers' tack pieces.  Sometimes you just have to gamble.

Showing the Triple Thick jar

N.A. XVI, my current benchside log of tackmaking notes, has 16 pages on #325 sans corona.  In contrast, what photos I took are few and uncoordinated (!);  but there are enough to tell the story.  After I brushed glaze over the edges of silver parts on fenders, skirts and taps, I switched to working on the bridle to let things dry.

This is the bridle before.  Near cheekstrap:  note the broken silver tape and its missing spot at the strap end.  The tape had been tied down with waxed linen thread, a blunt-instrument way of staving off lift but one which worked.  I would choose to keep using this trick for this saddle.

The peeled-off old silver was stuck into the tack notebooks.

Here's the same cheekstrap with everything peeled off, the leather cleaned (rubbing alcohol and scraping) and a new piece of silver tape ready to go.  The pattern of squares is clearly seen on the leather.  When the tape is placed, finger pressure will show guiding dimples.  Stamping silver tape is, as always, a one-time-use material.  You muff it, you gotta start over!  But tape is cheap.  This stamping is not done with a hammer or mallet;  wrist strength is enough.

This shot shows the famous old TSII manganese bronze stamps, made in 1979 with the help of a friend (Amy Helen Hurst) in jewelry class.  I carved them from wax, she cast them and I set them in wooden dowel handles.  You could say the TSII itself was born from these 2 priceless stamps, the square and the diamond.  I made all my silver Parade saddles with them, from #017 onwards -- all the way to the end of my stamped-silver era, with #447 in 2008, Eleanor's all-ikandi set.  Of course they are invaluable for restorations.

I love the little details of #325:  there's tiny notches in the noseband to allow for the encircling linen thread stitches or ties (below, at bottom).  There's no hole in the leather, it would have weakened it too much, so these ties are not really stitches.  I didn't have tiny needles then, and apparently the visual ugliness did not weigh!  The cheekstraps did not have those notches;  apparently the straps were too thin to risk even that.  Here's a brief shot of the browband and noseband before, with one new buckle on a strap.  All of the old galvanized steel buckles were taken off and replaced by handmade stainless steel ones.  Even as early as 1991, when Art Deco was made, I was hammering my wire buckles;  it gave them strength and beauty.

Fully restored, like-new cheekstraps!

The spots on the strap end, where the poll bent and was used the most, were painted-silver and are now silver nail-polish.  That was as close as I could come to the sometimes-conflicting goals of preserving original design yet coming up with a workable and lasting replacement.  The browband got new silver.  Here's a view of the face drop and its colors, somewhat ahead of my narrative:

I see I haven't mentioned replacing the fender buckles with stainless steel ones, or glazing the skirts, taps and lower serapes, cleaning them first.  In the case of the tapaderos, disassembly was the rule for complete cleaning.  "Microbrushes and Q-tips died in the service of this resto."  I did find out that stroking verdigrised microbrushes on  rubbing-alcohol-wetted paper towels cleaned them very well.  Somewhere early on the rein ferrules and face chains were polished.   (Ole cheers to my tub of Wright's Coppper Cream!)

One great challenge with #325 was replacing lost parts.  Remember the upper offside serape?  This was the largest part missing from the entire saddle.


Although this photo doesn't show it well, many pieces of red prism tape had somehow faded, gone pinkish.  This loss of color didn't apply to the blues or golds!  Go figure...  I replaced as many red diamonds as I could.  That was easy compared to coming up with a silver tape 'network.'  Judy called these 'framing side bits.'  There were no patterns other than the actual design sheet;  apparently this was before I kept patterns.  Alas for decades of envelopes -- they started too late, at #368!  So I traced this part from the saddle's near side.


Yes it was a bit hair-raising placing this.  The serapes could not be taken off.  But in the end things aligned.  Repeated layers of glaze helped hold down this area, one of the worst offenders in terms of bending.  Missing blue prism tape was also replaced; an example is the upper left thin curve of the larger right arc.

Speaking of layers, I found the hard way that too heavy a glaze coat would result in crazing (crackle).  This is news how?!  Thinner coats and water helped considerably. 


 A later step, after all the glaze had dried and after silver repairs, was oiling.  I hesitated to soak this piece in black dye, preferring the combination of Lexol and Dr Jackson's Hide Rejuvenator [Dr J's] to return color as well as preserve leather.  Lexol, brushed on, tended to leave a 'dusted' effect:

While Dr J's, applied by finger over the Lexol dust, gave a velvety-dark look and smelled like leather.

 **************************************************************************

We've reached the breastcollar, a separate country.  Everything I'd learned had to be applied all over again!  Here's a close-up of the original buckles and their wiring:  galvanized steel wire, dark grey and quite oxidized after 33 years.

And here's the hardware taken off the breastcollar and replaced with stainless steel, my standard for silver-color wire since 1999.  Unfortunately I misjudged the size of the wrapping wire -- it was 26ga, not 24ga -- and this error caused me to break the neckstrap's buckle lace.  I squeezed it too tightly, trying to get that thick 24ga to behave.  This was the first, and luckily only, piece of leather I had to actually replace for the whole restoration.  When you're trying to retain as much material as possible, this was regrettable but forgivable.

The drops were in relatively good shape and only needed a bit of cleaning.  Their hanging rings, which had turned green, were replaced.   Below:  cleaning those hanging-ring holes is how I got verdigris on my microbrushes in the first place --!  Attack both sides,...

The drops' chain links were tarnished.  Bad news:  I could not find an equivalent-size new chain.  Disaster:  I'd have to polish all 40 links -- !!  Two per drop, ten drops for the breastcollar and ten for the serapes,... So that is what I did.  "Many Q-tips died, et al."

Below is as close as I can come to proving how tarnished the links were.  Unpolished links on the left, polished ones on the right.  The difference was too subtle for my camera to catch.  The first polishing scared me because the results looked goldish, thus indicating brass, something which didn't fit in with my ideals for this glorious piece, so rich with sterling.  I held the polished links up to some sterling wire and realized that clean sterling has a golden tone to it, and that they matched!  Aluminum (the silver tape) is blueish.  Yes, silver has different colors!  but in applications as small as these, it's usually not a problem.


This shot also shows how dirty the drops could get.  Gentle stroking with rubbing alcohol with microbrushes and Q-tips took care of that.  Below:  all the new stainless hanging rings laid out.  This view shows the lifting of silver panels on the breastcollar, particularly on the off side and where the off shoulder meets the chest.  It took several layers of glaze to stabilize this spot.

Above is also a good view of some missing silver tape, the outer border of the blue on the leading edge of the off side shoulder field.  This was replaced with fresh, and like everything else, coated in Glaze along the edges.

Very late in the game, here's an earlier shot showing how crumpled the near side* of the chest shield was when I first got this saddle, amoung other things.  This was the second most damaged place, and it was delicate work gently coaxing it to unfold and go back to being flat.  *Off side as viewed from its front, near viewed from sitting in the saddle.

Back at the restoration bench, I experienced a combo of queasiness and excitement at peeling back the entire chest shield top, on a quest for cleanliness and fresh prism tape.  The top shot shows the original find,


while the lower shot shows new prism tape in place, as well as cleaned older stuff.  This is as revealing as it gets.

To give you hope, let me show you a couple shots of the finished and restored breastcollar.  This first view is a sneak from the next post, wherein all kinds of horses got to wear it.

The rack shot is the final goal, and this one caught the colors.


After more than 2 weeks (plus 5 weeks if you count the corona), and in a sense after more than 30 years restoring TSII model silver Parade sets, the job was done.  It took some time to accumulate the oumph to hold a photo session;  I passed up the last fall days with their clear sunny weather (too busy), and had to shoot indoors.  When I did gather the herd I thought would fit, the results were educational, marvelous and fun!  But that's for the next post.


Thursday, November 28, 2024

A Book List


This post had its conception in a sentence that kept hammering away in my brain after November 6.  "WHAT WERE THEY THINKING?!?"

Gestation and birth came in two more sentences, the first of which was something like "What were they exposed to, living with, pondering, reading??  A person is what they soak their brain in."  (Or pickle, I suppose...)  I experience my world through books.  We read when we eat, the both of us.  (That was a condition of courtship, by the way.)  Books are such a good way to find out, answer questions, open up what's been closed and discover what's true.  Safer than almost anything, they keep your brain working.  Alas, alas, no matter how justified, how good-feeling, or even how natural (!), biting snarky comments and cutting witticisms just aren't the best way of getting a lesson across to most people.  Take it from the wife of a professor: punishment does a poor job of teaching.  (As I've said: alas!!)

The second sentence was a much harder concept to articulate, but here's my try:  "What if I knew someone, from that far horizon of otherness, would sometime (any time, now or forever), wander by my blog and be inspired by this list?"  It's a long shot but right now I feel like that's about the only shot I have.

image from Google

Something Wicked This Way Comes (1962) by Ray Bradbury.  Although my cover is from the movie, I strongly emphasize the book, NOT the movie!  It's here not because of its title but because it is family fare for Halloween, a seasonal tradition for me.  One paragraph leapt off the page:

        "Have I said anything I started out to say about being good?  God, I don't know.  A stranger is shot in the street, you hardly move to help.  But if, half an hour before, you spent just ten minutes with the fellow and knew a little about him and his family, you might just jump in front of his killer and try to stop it.  Really knowing is good.  Not knowing, or refusing to know, is bad, or amoral, at least.   You can't act if you don't know.  Acting without knowing takes you right off the cliff." -- page 146 [bolding mine]

image from Google

    Rebecca by Daphne du Maurier (1938).  I happened to be reading this British beauty (which I've always loved) after Bradbury.  While the book is famous for its vivid sense of a haunting spirit -- a major character dead before the book opens -- what seems relevant to me now is its portrayal of how to deal with a seemingly powerful yet ultimately unsavory person.

I put up a book list at the start of the pandemic: here.   It so feels like that again:  A long darkness stretches before us, full of dangers unguessed-at.  Contacts, reassurances, reachings-out-&-touchings of friends are what we did then:  stowing away the good times against an unknown future.  But some things today are Not like pandemic was then.  This time we have an end date.  Also, we know we're not alone:  That election was Not a landslide.  It was amazingly close, a razor's-edge win.  "By a nose."  And we know, oh yes, so much more about the vulnerabilities of certain old white men.

Image from Google

The Two Towers (1954) by J. R. R. Tolkien.  I'm including this one solely because of the description of Saruman's Voice.  Can there be anything more appropriate --!!?!

Wooops just realized there's more than one twin tower here,... unintentional, folks,...

image from Google

102 Minutes by Jim Dwyer and Kevin Flynn (2005).  I'm including this one because it is a first-rate example of non-fiction that is as compellingly un-put-down-able as fiction.  Also, it uncovers the roots of certain controversies of the event, a breath of fresh air, badly needed.  I present it as supporting evidence to my claim of living through books.  I'VE NEVER SEEN THE TOWERS FALL, even now:  aye, it's true!  I don't own a TV.  With books like these who needs it?!  A first-class job of even-handed research and explanation, made more meaningful by my finding out about the National Bureau of Standards (National Institute of Standards and Technologies), which carried out analyses on pieces of the towers afterwards.  My father's career was at the Bureau.  If you only read one book on 9-11, this is it.

FEAR, by Bob Woodward (2018).  Impeccably researched, soundly documented, Woodward's probity needs no introduction from me.  I've always felt that his 2 masterpieces in the series (FEAR, RAGE) should've been followed by a third, appropriately titled (by me) MADNESS.

Image from Google

Educated, a Memoir, by Tara Westover (2018). 

Westover's is the crown jewel of this small selection.  The book is astounding on many levels.  If it's a repeat from my earlier list it's because I recently re-read it, a sure sign of its turning into a deserving favorite.  It opened up a world I truly knew nothing about.  It always makes me wonder how the heck she found the courage to escape. 

Unlike my earlier post, this one could go on quite a ways with Kindle e-books.  I'll settle for listing some of my collection that come to mind:

Exvangelicals by Sarah McCammon (2024).

Too Much and Never Enough by Mary L. Trump (2020).

Leviathan Wakes by James S. A. Corey (2011)  Not political at all, I just finished reading it and could not put it down!!  Serious science fiction (which stood me in such good stead during the pandemic).

Breath and Deep by James Nestor (2020 and 2014, respectively).  Yeah, yeah, I know, I know, repeat repeat.  I really like 'em and they've changed my life, so there.

The Room Where It Happened by John Bolton (2020).

The Nine by Jeffrey Toobin (2007).  If you've ever wondered what went on in the Supreme Court.

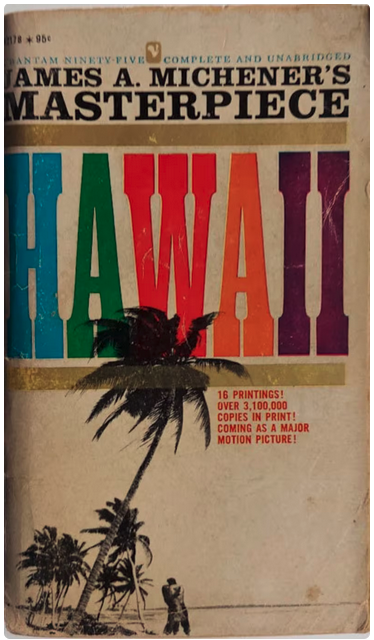
A later addition is a couple of long, non-Kindle, 'actual paper' books which have given me great insight into historical American Republicans and Democrats:  The Emperors of Chocolate by Joel Glenn Brenner  (1998), especially the part about the strike at Hershey towards the end;  and Hawaii by James A. Michener  (1959), especially the later part about the sale of Gregory's and the Democrats coming onto the islands.  I may not know "what they were thinking," but Hawaii helps in giving me much more of a guess.

image from Google

*************************************************************************

After all that, I hardly need re-recommend Heather Cox Richardson, historian and online commentator.  But I will.  At first I found her too overpowering but times have changed.  I welcome all such sources, even if, like a gas lantern, sometimes things hiss and use up the oxygen.


Sunday, November 3, 2024

The Blanket Problem


Here's a peek at what's been taking forever in the restoration of TSII #325, the Classic scale Fountain Art Deco parade set.  For reasons known only to certain stubborn artists of long-lasting age and fame, I chose to update the old fleece-&-marker blanket with the highest technology of which I was capable.  The soft, fluffy and oh-so-realistic texture of a tufted corona blanket was irresistible to me.  And what better way to deal with the old blanket than to use it for the base?

With thanks to Melody Snow for her book on making model corona blankets.

There were other delays, chief among them a 3-week road trip to Tucson (from central Pennsylvania) to see my father.   It was during this trip I started the corona.  I began with a piece of polyester satin for the larger bottom sheet, which I used to make the corona hoop-able.  It also covers the bases of the stitches and shields the horse from them.  But the satin was a mistake.  It was too thin and shreddy, and also my piece of it was too small.  What you see in these shots is some old cotton sheet from my Dad's ragbox.  The cotton sheet worked far better.

 Returning home, alas, did not give me any more time.  A week was needed for putting things away and dealing with everything that awaited us, from shopping, banking and voting :)  to car repair and trying to speed up doctor appointments (not done yet).  I slipped in hours when I could.  Below is the same stage as above except with the loops clipped and much trimming and fluffing done on finished color blocks;  and then those parts were squished into the hoop so I could move on to the rear.

The tufting process is incredibly laborious.  Make up embroidery floss strands;  thread the two-holed needle with a special device (twice for each color);  stab and withdraw multiple times, flipping over the hoop to view each side each stab until a block is filled;  then switch colors.  I wound up purchasing a second tufting needle.  To my dismayed surprise, although its packaging was identical to my first, the size was different.  It was notably larger!  This could have been a disaster!  But instead it allowed me to tuft twice as much floss.  Oh the relief,...

Once the loops are in place and the FrayCheck on their bottoms has dried, they are cut, and the trimming and fluffing begins.  I use both my Needle Awl and a wire brush from Precista (designed for preparing archeological specimens!) for this.  The pointed scissors themselves, of course, are also used a lot in the fluffing and trimming process.  

Close up uncut loops

  Finally, eight days after our return (Oct 25 to Nov 1), I was able to finish the tufting stage of the corona. 

As of this writing, most of the trimming and fluffing is done, and the bottom sheet is being cut and sewn up.  To my relieved surprise, the saddle seems to fit on the corona blanket well enough.  In the 2nd photo, you can see a paper pattern at upper left;  this was to represent the saddle edges for purposes of corona blanket fitting.  But fitting wound up not being a problem.

 Here is a glimpse of the underside of #325's corona, halfway through the tufting. This is the only evidence of that earlier satin sheet:  see the way the front corners are missing their red & white color-block bottoms.  Those parts, already done and covered by satin, are hidden by the later cotton sheet.

 Yet this is only the beginning of the saddle's restoration process.  That is what my title refers to:  It isn't just a problem with this particular blanket.  The problem is balancing one's desire to stubbornly run down rabbit holes (after all, this behaviour made the TSII what it is today!) with the need to timely supply product, to keep promises and to meet deadlines.  It's a universal toughie every artist faces.  Difficult choices sometimes seem to cover me over, muffling everything, smothering the muse.

I've made a list for #325:  Polishing, sealing, replacing, cleaning.  At the moment I'm estimating 15 hours for the job.  That could be a few days, a week or two weeks, depending on what else is happening.  The set is, in fact, in pretty good shape.  The chances of conserving a large portion of the silver, instead of replacing it, are high.

I look forward to working more with this thirty-three-year-old Parade set.