This post aims for two goals. One is to show how ridiculously easy this project is to make. The hardest part is peeling the box! Scroll down to a photo-rich series of instructions. My second goal is to capture, however imperfectly, the 180-degree switcheroo I went through, from resistance to pride in the making. How did I accomplish such a changeover?! What got me past my emotional wall of resistance and refusal? (There certainly were tears!) It seems to me the phenomenon of volte-face is more interesting than usual these days.
If you collect Breyers and are reasonably handy (i.e. you have a hole punch somewhere in the house), the ingredients for a face shield like this should be lying around. One: a Trad scale horse. I chose this one because it was his turn to be opened.
I haste to add a screw and nut would work. So would a paper brad. So would a short bolt and nut. So would a stapler! In a pinch, a needle and thread would do the job... although a shield sewn down would be much harder to lift up.
The argument for a face shield is that it protects the eyes. It also enhances the protection of a mask, redirecting air currents around the face. I don't disagree with the science. What I didn't like was the sheer unfairness of asking even more from somebody who'd already given so much... where does this stop, we've gone from paper masks to fabric to gloves to changing grocery stores to... and also there's Embarrassment.
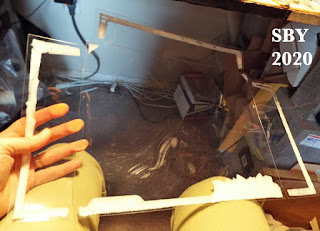
Fingernails were useful. Flatten the sheet carefully.
Test for your face. Then cut as suggested by the pink dotted line below. I decided a little overlap of paper, cutting through the tips of the mistletoe leaves, would not offend. The longest straight line, at top, is the top of the shield. The curved bottom was cut to take advantage of as much plastic as possible.
I really like a face shield that extends as far down as this. Of course there are different Breyer box sizes, and different face sizes too. This pattern was cut by eye: I have no pattern to give away or sell.
I used drafting templates to help shape the corner curves, and a leather hole punch to make the holes. The hole is about one inch in from all the edges. The curves could easily be done by eye.
I held the sheet of plastic around the cap's bill (or shade), while wearing the cap, to find the best place to punch the holes. In this case the best spot for the hinge hole was in the strap, close to the edges of the bill.
This cap was so thin and the keyposts were so long that I had to add some shims. I used leather pieces.It was a lovely coincidence that the horse whose box this was should be wearing a mask himself.


I am totally gobsmacked. What you have done and how you did it is amazing!
ReplyDeleteBrilliant!
ReplyDeleteCame back now for this because with glasses, now the weather has those masks fogging up my glasses quick, AND freezing the fog onto them! Face shield to the rescue. :)
ReplyDelete