Thursday, June 4, 2020

TSII #89: Restoring an Old Saddle, Part II of IV

TSII #89, Before restoration
This is Part II of IV about restoring a 35-year-old model Western saddle.  It will be concerned mainly with the fenders.  Part I introduced things, Part III will deal with the seat and cinch and Part IV should show the finished set on two different horses.  This whole series is a perfect example of how a simple polish-&-update job galloped off down a rabbit-hole into a four-part series on how I made saddles back then... !  Enjoy.

Having finished restoring the back cinch of TSII #89 (Part I), let's move on to the fenders and stirrups.  This post will also deal with girth rings, stitchmarking and signing.  Fenders and their accompanying straps, buckles and keepers are (in my opinion) one of the biggest make-work parts of a Western saddle! and they're just like the back cinch.  To access the fenders, I had to take the seat off.  I'm saving the seat for Part III, so that's where its taking-off occurs.  Here, we will just show what's underneath the fuzz lining.  Peeling the fuzz lining off the base plate is one place where force must be used.  I just rip it off, leaving its front part still attached to the saddle.
This amazing picture shows many details.  The two dark spots are the third-point concho strings.

It is difficult to distinguish the fender stitches from the girth ring ones here, but their thread is in two different colors:  it's lighter natural for the girth ring and darker brown for the fenders.  The color is better seen below.
The fuzz lining was originally glued on with Ambroid; later in the restoration it will be stuck back down with Aleene's or an equivalent white glue.

Here the fender stitches are being cut and the fenders pulled off.  I picked out and discarded the thread of the stitches.  A lot can be seen here:  it's the topside of everything labelled above.  Much to my surprise, there was an untooled leaf on the second skirt!  I must've thought that since they couldn't be seen, they didn't matter.  I could not resist tooling those little suckers the 2nd time around...!  I also tacked down the front corners of this part, the second skirt, with more stitches.
You can see the registry number, 89, in its customary place, just under the offside fender, on the base plate (bottom skirt).

This shows disassembly of the near fender.  That sounds worse than it is.  There's only two buckles to a fender: the fender keeper and the larger stirrup strap.  All the leather should be oiled, that is, treated with your favorite leather preservative or dressing.  Do what you can to keep the near stirrup with the near fender and the off with the off.
Here are the fender keeper straps, which go around the fenders just above the stirrup.  This is not the same as the stirrup strap keepers, which are located higher up when fastened, on the inside end of the fender, and are concerned with height of stirrup and length of leg.  (The equivalent of Blevins buckle keeper in full scale.) (Visible above, just left of the stirrup.)  I'm positive I have not consistently used these terms in my tack Notebooks, sorry!
TSII #89 fender keeper straps, before
Cleaning off the white guck after unwiring is as simple as wiping the lace with a paper towel.  Stash the old hardware somewhere else.  I suppose I'll eventually throw all mine out.  I've amassed quite a collection since I started restoring saddles, but I honestly don't know what to do with it.  Nickel or chrome plating would be great, but I've never heard of plating onto galvanized...
Below we see bright new buckles being sewn on.  These are 24ga stainless steel wire.  Handmade buckles suit me:  they're cheap, fast (mostly) and the ultimate in customizable, plus they give a signature feel to the piece.

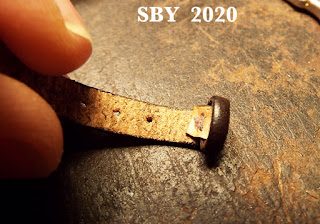
A bit of personal preference here:  This is a great chance to cut the strap tips more professionally in-scale than a cheap quick ugly straightacross angle.  The old one is on the right, the new on the left.  Smoothly pointed straps go through buckles more easily, too.

Girth Rings
When the fenders came off, the girth rings appeared in the queue of stuff to be dealt with.  I used split rings, then as now.  They can be taken off without cutting stitches, but this requires dainty handling; I might add, strong fingernails.  The old rings were 8mm and brass; I wanted 10mm and silver-color.
This is the tie strap, or latigo as I sometimes call it.  This is another case where my notes do not always use the same term; I also call it the cinch strap.  It has to be taken off, unwired, cleaned and oiled and the ring replaced.
Sewing the join.  This is my medium-size glover's (triangular) needle.

Signing
This is a good time to decide about signing.  Here is my answer as to how to indicate the saddle was extensively restored and rebuilt without ruining the original signing.  "SEB" (dig that almost-cursive) were my initials when the saddle was made:  Susan Elizabeth Bensema. 
I'm just going to trust that the world knows it's 1985 for the 85 but it's 2020 for the 20.

Stitchmarking
I chose to stitchmark every part of the saddle that didn't already have it.  Back in 1985 all I had was a pounce wheel, probably from a graphic arts store, as part of my college degree in drafting.  TSII #89 had its breastcollar chafe, stirrups, back cinch and back cinch billets stitchmarked with this.  It made for big, deep, widely spaced dots.  Sixteen years later, in 2001, I invented my own miniature stitchmarker (after several tries), and its use has become standard practice in my shop.  This touch of refined elegance is not much visible in the photos, but in person it makes a difference.
TSII #89 fenders before and after

When the fenders are reassembled, it's time for one of the fun parts.  I hate to admit it, but so many of my early saddles hung their fenders too low.  It's a subtle but characteristic mistake, probably resulting from paying too much attention to the tooling and not enough to the saddle proportions as a whole.
Positioning the fender is done by eye.  Can you see the difference?
TSII #89, before (left) and after (right)
These shots were taken before the seat was reshaped.

Starting to sew down the finished fender.  The job takes my biggest glover's needle.  Note my two unmatched clips holding the fender, a little clothespin and an orange plastic clip with a rubberband.
What it looks like underneath when done:  that dark brown stitch patch in the center of the base plate is the near fender. It sits higher than last time!
That glorious moment:  Did I get the two sides to match?  Symmetry in model tack really matters to me.
A view from above of the finished fenders sewn on.  This central hump of leather has the potential to provide a sort of grounding or base for the seat.

Another vision of the finished product before we depart for Parts III and IV.
TSII #89 on Valhombra/Carrick

Wednesday, June 3, 2020

TSII #89: Restoring an Old Saddle, Part I of IV

TSII #89 after restoration
I have built over 450 saddles across 42 years, yet it's rather rare that I get the chance to work with an early one.  In January of this year I chose to accept a trade-in deal.  TSII #89 was built in 1985; by a slip of the pen I referred to it as #85 for the next 4 months, for which I must apologize!  For a piece of model tack 35 years old it was in astonishingly good shape.  It was so ancient that silver paint had been used for its corner plates and stirrup spots (a method used before Rio Rondo opened in 1990), yet the paint was still so bright and sturdy I decided to leave it as it was.  Kudos to its owner, who had kept it all 35 years!
TSII #89 before restoration
What constitutes restoration?  What did it need, if it was in such good shape?  Since the materials were so well preserved, only technological advances and silver polishing really needed doing.  'Technological advances' expanded, by that mysterious grapevine of artistic rabbit-hole enthusiasm, to include major reshaping of the seat.  This meant disassembly of everything except the pommel.  I have learned a lot about improving tack in 35 years, and this was my chance to bring #89 up to standard; yet I wanted to retain as much as possible of the original spirit and look.

Detailing how I restored this very old TSII saddle will take several posts.  Part I approaches this saddle's restoration in general, and starts with something small but representative, the back cinch.  Part II moves on to the fenders, which necessitates peeling off the fuzz lining.  Ever wanted to look beneath on an old treeless?!  Part III will backtrack a bit to show disassembly, that is, pulling off the seat, and then depict how I reshaped it.  The seat is the heart of a model Western saddle.  Part III should include views of a new cinch.  Part IV will celebrate the finished piece on two different horses in two very different places!
TSII #89 before restoring.
My main selling point in restoring old TSII saddles is replacing the galvanized steel hardware (buckles, rings and wraps) with stainless steel wire, which does not corrode gray and remains bright and shiny.  Secondarily I chose to raise the hanging of the fenders and to reshape the seat by bracing and darting.  I made a complete new cinch:  this was a real tech advance for me, something I had learned just a week ago! 
Thirdly I chose to replace the brass crimps on the bridle with stainless steel wraps, decoratively stamp the existing conchos and make new back cinch keepers since I didn't like the old ones.  I cleaned everything, stitchmarked everything that didn't have it, oiled everything with leather conditioner and polished all the silver, a delicate job since I could easily have broken something.  I was ready to replace whatever I broke, -- but (again astonishingly) nothing broke, -- not even when I rolled it back and forth vigorously during polishing.  No. 89 was well built.  Wonders never cease.

TSII #89's  Back Cinch
If ever you get a chance to tinker with one of these, (there are over two hundred out there, depending on how you count; I was hanging fenders higher by #145 and darting seats by around #250), start with an easy part, like the back cinch.  In the beginning it looked like this:
TSII #89 back cinch buckle, and one of the bc straps
(Apologies for the different background colors.  I'm still learning PhotoShop, even after 20 years.)
TSII #89 back cinch connector strap, Before
These buckles, all handmade from 24 and 20 gauge galvanized steel wire, show the typical gray scaly texture of galvanized steel after 35 years.  The above also shows my signature wire wrap, on the buckle of the back cinch connector strap.  Cut the stitches, and unwrap the wire with needlenose pliers.  Clean the leather; just wiping it free of the gray gook will do. 

I'm jumping ahead somewhat, but here's the pile of old hardware I took off this saddle.  The long wire at right was the wrap around the main cinch tie strap.  The large rings were the girth rings, the pins (looking like little 't's) were the ones that held on the seat, and the brass bits in the lower foreground were the brass crimp beads set on the bridle.
Some of this hardware is green with verdigris; this indicates the presence of copper in the metal.  Wipe verdigris off the leather with Q-tips or dissolve it off with rubbing alcohol.  Replacing the offending metal was the largest part of this saddle's resto job.

Let's return to the back cinch.  This is what the billets looked like when it left the shop in 1985:  neatly sewn, with a simple three-hole tie done with waxed thread.
Cut the stitches and clean the billets.
Make new lace keepers and sew them on by lapping over the top leather and attaching them as closely as possible to the top.  I'm trying to save strap length here.
This next picture shows sewing on the new buckle for the back cinch connector strap.  The new buckle is bright and shiny, made from 24ga. stainless steel wire.  You can't see it in this pic but the ring has been replaced with stainless steel too.
This interesting shot shows my grab box of roller tongue buckle parts.  The wire is 20ga stainless; the ferrules are cut from Aluminum tubing, a section of which can be seen.  (They don't actually roll.)   A couple of pre-made tongues (22ga here) can also be seen.   Getting the curl right on those is an art in itself.
One can never have enough pre-made parts on hand.  I swear most of my saddle-making work is in these humdrum parts, filing and bending and filing some more, hammering the tongue bases flat and filing the ends square across so they close smoothly, hammering the tips the other way so they'll fit into slits easier,... filing the tongue tips smooth and round so they don't prick you... filing your fingernails...
And here's another shot full of work.  I hated the old bumpy leather of the back cinch keepers.  (I'm afraid there is a lot of that leather in TSII pieces from the 1980s.)  I replaced them with new, smoother, stitchmarked lace keepers.  Can you tell the difference?
Other work concerning this part of the saddle included cutting the slots for the tongues a little wider and painting them with Edge Cote.

I'm pausing at this point.  Work will resume with the fenders in the next post, Part II of IV.

Tuesday, May 26, 2020

Renaming a Horse

When the world changed its axis back in mid-March, I looked at my 400-odd herd and said to one of them, You gotta change yer name.  A horse called Corona Corona is not gonna be welcome.  This was extremely low on the totem pole of necessities, and time went by.
Unlike most of my horses, I'm not sure how this girl got her name.  Since we don't drink, a direct association with beer wasn't the source.  (However, we have named our cars after drinks.  'Nother story.)  Corona, after all, refers to the rays around the sun, an encircling crown;  it's a good name for a horse with an association with the silver screen.  Perhaps there was a little tack-taste in there too:  In silver saddles, the word refers to a specific type of blanket which encircles the saddle.  (This is one place where I'm not going to quibble with the word today.)  However improbably, Corona Corona stuck to the gray.  She is abbreviated in my Digital Warehouse of pictures as Cor.

The Breyer name of this horse is Stage Mom.  She was the first BreyerFest SR release on the Giselle mold, which came out in 2008.  Stage Mom and Child Star were issued in 2010, in a run of 1200 pieces.  I loved the mold from the moment I saw it, and wanted it enough to consider getting a gray.  (For some reason, I didn't get the pinto Melange.  Not sure why - perhaps I wasn't lucky.)  (I did get the chestnut porcelain Giselle, and since I don't collect porcelains any more than grays, that tells you something abut how I desired her; but she was a different size.)  There were only 2 problems with my obtaining Stage Mom.  I didn't like grays all that much; and this was the first year (2010) I was ever prevented from going to BreyerFest, for medical reasons.  <very wrinkle nose plus glare>
So the gray mare and her smokey foal came to me under pioneering circumstances.  Good friends interceded for me, picked them up in Kentucky for me, went to the trouble of shipping them to me -- a first.  Of course I paid them back.  That sort of thing makes a horse precious.
The foal had its name changed in the intervening years, from Starchild to Smokin Ash, (after visiting the site of a forest fire).  Changing a name is usually an attempt to foster more attention, more 'liking' to a particular horse.  Sometimes it works.  Sometimes it doesn't, and the model winds up in the sales box.
One might naturally ask why I didn't trade in Stage Mom for Valentine.  I loved that warm bay, especially the glossy!  But I had spent the fall of 2010 and the spring of the next year making a bridle and breastcollar under unusually intense emotional conditions on this horse.  This was A. Giddings' set, and it was a trailblazer (below).
TSII #432, A Giddings bridle & bc
When a tackmaker pours more than the normal amount of attention and effort into a piece of tack, they bond with the horse more deeply than normal.  That is what happened with Corona Corona.  This was a bridle that saw me through some of my darkest times.  I survived, and some of the intensities of the journey were embedded, as they can be, in the tack... and in the horse.  There was a lot of emailing during the long making of this piece; Angela was going through a dark time herself.  We comforted each other across the miles and the months.

So I had reasons for keeping this particular pony.  Breyer's habit of releasing horses in multiple colors is very hard on those who need the molds for tack purposes but don't have space or money or psychic energy for keeping multiple copies.  I bond with the first color (that I like) out of a usable new mold and then have to make a decision, sometimes several decisions, later on, when more desirable colors come out.
I can conga some horses, and I have done so... but I cannot justify multiple copies of the same mold in every case.  This is a recurring problem, and it only gets worse over time (through proliferation of molds).
TSII #432, A Giddings bridle & bc

Corona Corona was taught to drive, and assisted in the creation of a spectacular collar harness in 2012.
The collar and bridle were some of the best harnesswork I've ever done.
Here she is showing off on the front sidewalk.  That's my Wood Wiz Meadowbrook Cart kit.

Previous to that, I'd used her in the formation of a Four-in-Hand Chuckwagon Racing Team Harness.  This was in 2011.
Oh yes, there were lots of tackmaking memories in this horse.  The photo record showed her being active for the first few years, and then she quietly retired.
Until now.

My husband has formed the habit of watching South African and other African wildlife webcams.  I peered over his shoulder the other day and saw he was on the Maasai Mara.  What to my wonder should appear but a most beautiful name:  Kalangala, one of the towns or campsites there.  It sort of leapt out at me.
I also happened to be reading one of Laura Crum's Gail McCarthy Cutting Horse mysteries.  I decided to pronounce the 'gal' as "Gail."
I wanted to keep as many elements of Corona as I could, given how long this mare had been living with it, and how many records there were in my files.   I changed Kalangala to Korongala.  This necessitated changing pronunciation a bit:  "Core-Oh"  became "Kore-On."  But it could work.
It could work.


Saturday, May 16, 2020

AT2 - Brasenose's Breastcollar Finished

Better late than never!  More than 2 weeks after the end of International Model Tackmaking Month, I finish my piece.  The breastcollar was begun on my birthday at the end of April...  but the set it belongs to was begun a year ago, near the end of the 2019 IMTM.

Although this next shot is the official 'finish,' I liked the above one enough to position it first.  It is a bit less retouched -- for some reason my camera makes his ears superlong!!

Due to, shall we say, interesting circumstances, Brasenose gets to model his beautiful emerald breastcollar against a backdrop of nearly the same green.  I rarely see Pennsylvania at this stage of Spring, because (since 2011) we were always on the road by the middle of May.  Not so this year.
I am grateful to Anna Helt and others of IMTM.  What a great idea!  Some of us needed a little extra time to finish our pieces.
And of course I am very thankful for Paula O'Keefe's help in obtaining the Rio Rondo dangles.  They really make the breastcollar!
 This photo shows the truest color.  Yes those are real emeralds.  The central stone is a green sapphire.

A few more views:  Quartering angle from the near front:

And close up on the off side.  Once again I failed to retouch his ridiculously exaggerated ears.  During this photo shoot I renewed my appreciation for sticky wax, something I normally detest.


Here's the chest.  I had to torture a 13mm gold ikandi to make the dome.


 Instead of delving into just why pieces are so late this spring, I thought I'd cruise on over to past examples and to how these are made.  As it happens I've only made one other set.  AT1 (Akhal Teke Presentation Set No. 1) used "carnelian" (red) instead of emerald green stones, and it was all silver.  It took over a month (March 20 to April 22) and I learned so much.  AT1 was sold during BreyerFest 2019.
 Here it is on my Charcoal Lonesome Glory, Obi:

And on Emerson / Palatlakaha:
The red looked particularly good on a perlino:

Here is a rarely seen shot.  I took my new Rocket (now named Alzucar) into the AllTech Arena during BreyerFest last year and blazed away when no one was watching.

Naturally I've blogged a lot on these Ahkal Teke sets.  There are a total of 8 posts on them:  Six are from 2019 and two are from this year.  Let's have an index:

Starting an Ahkal Teke set
Ahkal Teke  Jewelry Decisions
Ahkal Teke Buckle Questions
Ahkal Teke 1 - Starting the Bridle
AT1 - Bridle Finished
Ahkal Teke 1 Finished
AT2- Brasenose's BC Begun

And, of course, this one you're reading.

Now for a couple of review photos from the making stage.  This one shows the pine block where I stamped out every one of those hundreds of little bars of metal (aluminum)... and domed everything that was domed.
And this one, which shows the steps in making one of the square plates.  In this case it's a silver one from a 6mm square gloss silver ikandi.  (Ikandis = hot fix iron-on metal bling spots)

Having come this far, it's only fair to confess that I have a small stash of rubies,... of citrines,... of aquamarines,...  of garnets, sapphires, cubic zirconias, opals and others.  (I've been going to the Tucson Gem Show for many years.)  Think of what colors would look good on Wink!  or Altynai!!
 

My supply of ikandis, while large, is not bottomless and especially not now, when I've discovered Alora's Ikandis are no longer available.  :(  They're almost certainly made in China, but surely that is not the sole reason Alora's vanished.  I'm in the process of researching new sources for ikandis.  If anybody has any ideas for a source, I would be exceedingly grateful and glad.

Meanwhile I'm reminded all over again that this beloved hobby is still, even now, full of one-of-a-kind pieces, unique sources and scratch-built beauties. 


Friday, May 15, 2020

2005.06 Thoughts on Ben Hur

image from tumblr / Ben Hur 1959
My system for writing dates was inspired by Stardates (you Trekkies).  A post title starting with numbers thus indicates a private diary entry from my Notebooks, kept since 1977.  2005.06 translates to May 6, 2020.  It's time for some of my Notebook writings to appear;  I just can't decide whether here or on FaceBook.  Notebook entries are often written by hand in the middle of the night; this one was.
Despite the title  :)  this has nothing to do with horses.
image from pinterest /  Ben Hur 1959
"...for down in that haunted hell even time was lost ---"

This perfect quote comes from Ben Hur -- I think.  Oddly, the next quote that comes to mind is an entire story, Stephen King's novella about a jail break, out of Different Seasons.  Shawshank Rebellion? no, Redemption. ?!!?  Odd because I can't imagine 2 more opposite authors.  Yet they both have had tremendous influence on me...!!  I love them both, and rejoice in the variety of my collection.  :)   
Both the leprosy cell & the jailbreak are the same idea.  And both seem very appropriate right now.  We are in prison.  Like all prisoners we have come to an adaptation, an acceptance of our unnatural situation, and are putting in time.

image from pinterest /  Ben Hur 1959

On Ben Hur.

The book makes it clear that leprosy is very contagious and that there is no cure.  The reason Ben Hur must not find his mother & sister is the danger of infection, and all the consequences thereof.  "How much more painful if he became as we are!"  Yet the movie downplays this fact to the point where it is barely recognizable.  I don't recall hearing any mention of "infection,"  "contagious,"  "danger"  or even "catching"  !!  let alone "mortal"  !!!

As near as I can tell, in the movie Ben Hur's chief danger in visiting the lepers is seeing ugly people -- !!!!!! 
image from pinterest  /  Ben Hur 1959

Did Wyler (the director) think such distinctions too subtle to portray?  Did he believe leprosy could be cured, & therefore was not to be feared?  He tried hard to portray a noble & self-sacrificing woman, Esther, but again her chief danger appears to be witnessing disfiguration!!!!!   The actuality of polluted clothes, of a contagious environment, is shown only through the food-lowering device scene.   So much main action & emotion centers around merely seeing the lepers.  Touching them is (to me) [portrayed as] very casual.  I am left w/ the message that if you can bear to look upon a disfigured face, you are a noble Christian woman of great sainthood !!!!!

What a chance for the lesson of contagion -- passed up, passed by, turned down, left untouched.  It must have been too much for him.


Several days later.
I recall now the mother's efforts to escape from Esther and Ben Hur.  These were legitimate acknowledgements of the contagious nature of her disease.  But her weakness betrays her; she can't get away, and he touches her.
Esther's goodness and Ben Hur's stoicism are apparently enough to justify their sacrifice and gamble that Christ will heal them -- something the audience knows, but which they themselves could hardly count on.

In the book it is only Amrah, the old servant, who thus risks her life by going to be with (touching) the lepers.  Originally I was going to comment on Amrah's uneducated status and how she is guided and ruled solely and entirely by her feelings of the moment -- something so common today.  Then I recall I'm currently suffering a bad injury from having been guided and ruled solely by my own feelings of the moment.  Humans are such reactive creatures.

One of the most poignant and memorable scenes in the book, where the mother expresses her love of Ben Hur by kissing the sole of his sandal while he lies asleep, is completely missing in the movie.
But I understood her perfectly.

Whoever heals us will be as God.