Sunday, February 25, 2018

Brasenose in Tack: Headgear


Bridle by Corinne Ensor
These shots are from my 'midnight photo session' (2/20) as well as the morning after (2/21).  Hopefully you'll forgive yet another post on Brasenose!
He really is extraordinarily refined.  Dry -- I'll give you dry!  The result is that only my finest tack looks good on him.  Only my best Corinne Ensor English bridle:
Bridle by Corinne Ensor
I have a fair amount of English tack, even one with a braided browband by me.  But the instinct for refinement began early and stuck hard.

Only the thin metallicism of my Foust costume halters.  We knew this from early on.  Below is one of the few photos capturing the time he wore tack during his painting.
Layer 6, Halter by R Foust
Since the 80s I've had several of these Arab Costume halters that were extraordinarily thin, with metallic threads in them.  Out of my collection of blue, red and watermelon colors, blue's the best for Brasenose!  I'm reasonably sure they were made by Renee Foust, but not 100%.
Halter by R Foust
This is as close as I can come right now to the authentic desert look.  I'm ashamed to confess I didn't notice the tarnished chain until now!!  That means it's sterling, which is a good thing.
Halter by R Foust

Only my finest, thinnest Western tack looks good on him.  Of all my pieces, only the refined delicacy of my Griffindoone curb works -- but that could be its colors:  copper, silver, wheat, white tassels.
Bridle by Rebecca Dunne
Strangely, not Heather's or Regine's or even my own tack works tonight.  Later I might try my Fan Bridle or my Braided Snaffle (which I did:  see below).  For tonight, refinement is the catchword, spread across all 3 cultures.
Bridle by Rebecca Dunne
This Griffindoone style really does have a slender elegance to it that is entirely appropriate. Forgive the curb:  his muzzle is quite small and I just didn't notice!  I shortened it later but it still wouldn't get short enough.

I knew from the start this horse was going to look interesting in a great many cultures' tack.  I did not intend to limit him solely to Akhal Teke gear.  He's a dream of mine and not based on reality, though I shall forever be grateful to his Russian provenance.  I want to try English, Western, Arabian and (eventually) Harness on him, as well as the expected Turkmene styles of neck jewelry.  All in good time!

I am calling this his Calendar Shot.
Bridle by Rebecca Dunne
 He expresses my own Western roots as well as an Eastern refinement (not to say mysticism).  As I can do any horse culture I wish, so this horse, who feels so close to the essence of me tonight, can wear many kinds of tack.  Yet the king should be braidwork.  The blue Tassel and the Dunne seem better, right now, than the Ensor -- because they're braided, or appear to be.
Bridle by R Dunne
I'm amazed, but now that he's born (finished, separated from me, independent:  that calm, measured, assessing gaze!) it's an amazement of a different kind.  Previously, it was all about me:  my skill as a painter, the progress of the job.  Now it's all about him.  He puts my tack collection -- one of the greatest I know -- to shame.  A higher level of detail has arrived, and I can only bow down before it.
If none of my pieces are refined enough -- that just means I haven't yet made a piece good enough for him.

Next morning, such philosophizings have faded.  I wanna know what he looks like with various bridles and hackamores!  Tack show time!  Here's a wild one:
Bridle by Juliane Garstka 2002
This is one of the more interesting pieces I have.  She put such character into it -- the first time I ever saw braided horsehair done in model, and the first real rawhide wrapped buckle.  Juliane made the bit herself out of sheet brass painted silver.  The little tag is my attempt at true museum provenance; clearly, I haven't tagged all my pieces!
Bridle by Juliane Garstka, 2002
How good he looks in Western... it's reassuring...

Here's an oddball, my Braided Snaffle I was thinking of last night, taken in my traditional shooting spot with the tree behind.
Doesn't work, does it?  The tree camouflages his head, while the green in the sinew buttons clashes with the red.  Worse, the mouthpiece isn't positioned right.  It would work on a real horse, but models have restraints.
We have reached the golden oldies of the TSII.  To my relief (who was wondering?!) he looks great in them.  This is Tissarn's Hack, actually my favorite.
Bridle by SBY/TSII
Another calendar-pose, except the sky whited out.  Such lovely legs.
Hackamore by SBY/TSII
I will end this stretch of indulgence by going back inside, even though such good weather is precious.  This is the hackamore I used for his official Press Release portrait, the one most people would see.  I call it the Kathy's Show Hack.  It was inspired by a full page ad for Kathy's Show Equipment.  I did not know then that split reins are rarely used on bosals.  This piece was made in 1995 and it was the first time I'd managed interweaves on the nose button.  It has remained another of my favorite pieces, even though it's clearly too big for Brasenose.
This strange lighting is caused by the fluorescent light-bulb's tendency to throw a tight beam of light, and here he caught it on his muzzle.
He is well named!

Thursday, February 22, 2018

Brasenose Layer 11: Finished

 
 For at least a week I've been polishing this sentence:  Many microbrushes and Q-tips died in the making of this horse.
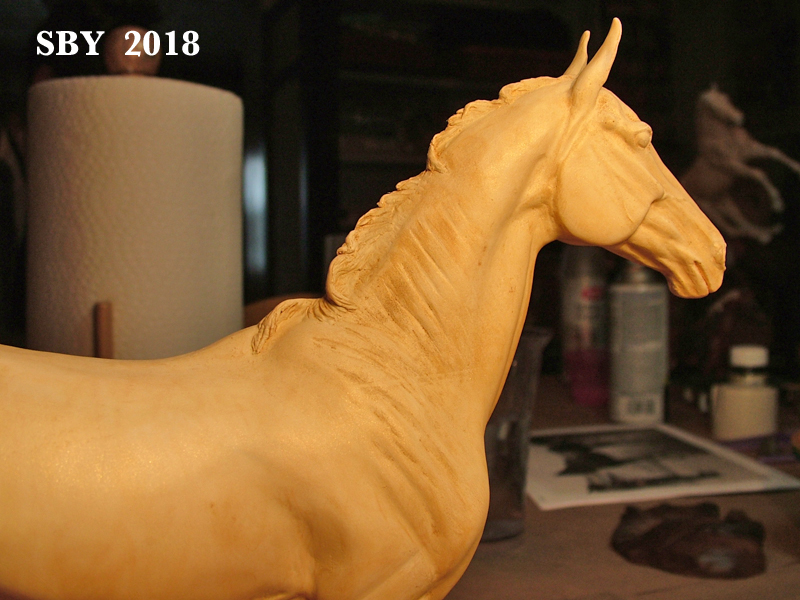
Here at the end, it's almost anti-climatic.  As I write I'm waiting for the nail polish on the eyes to dry.  (Photos were taken later.)  It's taking more than one coat, although the first coat did most of what I was hoping for.  Did I read tutorials?  Yes (see the Thank You list below).  Am I following them?  Barely.  I'm like Leonardo daVinci:  read up on something and then forget everything and just do it.  In this last sprint -- details, the homestretch --, I'm reverting to my tackmaking experience of 39 years, and using liquids instead of powders.  Outside of my test piece, a medallion started in January, and Rinker the Appy Etch (completed in 2015 - he took 2  1/4 years), Brasenose is the first 3D model horse I've finished since about 1983.  He was begun the 10th, finished the 20th.  Hard to believe: eleven days, 11 layers!  This record speaks of a lot of pent-up-ness.
This post will show Brasenose without tack, as he was the night he was finished and I sneaked out at midnight to photograph him.  I also went out next morning (the 21st).  After all the dire forecasts, the blue sky was rare and wonderful.  Pictures of him wearing tack were, of course, the main part of the 116 shots (clear evidence of infatuation), but those will be in another post.
Layer 11:  Finished
 In the middle of that night, a combination of snoring and excitement kept me up, so I started blazing away.  I learned to aim the lamps low so as to bring out his shading.  He looked like porcelain.  This is now my high-dollar horse, the one my husband always warned me against, for fear of breakage.  The incandescent bulb (the other is a fluorescent) gave him a deep golden glow.  Charmingly, the photo above shows his 'brazen nose" -- Pearl Ex reflections.
Thank You:
First and foremost, Jennifer Buxton, for birthing the idea of NaMoPaiMo and patiently listening to me when I said I'd never.  May she ever feel proud of what she's created.
Margarita Malova, who sculpted and cast this lovely resin.  To get the conformation as good as this speaks of many long hours and of other sculptures.  How is it the Russians have such a thriving hobby scene?  I'm jealous.
Olivia Miseroy, who posted the tutorial that I followed the most: Painting a Chestnut
Bobbie Allen and Lisa Smalley, who encouraged me with emails at the times it mattered most.
Sarah Rose, who sculpted Jypsi and then gave me one:  my precious test medallion.
Uncle Eli's, the art shop in State College which sold me some Jack Richeson pastel sticks, Pearl Ex and brushes.
George Young, my husband, who helped me clear out the storage barn (amoung many other things).
Last but not least, the Russian Post Office deserves mentioning.  For not much moola they shipped a horse halfway around the globe and let me track him.  Following his progress through some of the ground so familiar to my war-gaming George was a great pleasure for both of us, and a lesson in how other countries ship stuff.  I wish my own P. O. could be that good.
Pastelling is painting with powder.  His body and much of his mane and tail were done that way.  Never having painted a horse before, let alone an Akhal Teke with their metallicism, I was making up this color as I went along.  I kept no recipe.  I shaved the pastels into the bowl and mixed by eye, adding Pearl Ex in every layer.  I wore a mask and gloves.  By the end I had my favorite approach, scrubbing in the sparkling powders with a very short, broad brush, dusting with Mom's old Japanese moth-eaten bamboo and then going out to the storage barn to spray him.  The third brush down is the dedicated Pearl Ex brush.
Copper sparkles got EVERYWHERE.

This is a rare glimpse of how I carried him.  There was a lot of carrying, as the barn was across the driveway and around the end of the house.  That was one aspect that surprised me: learning to smuggle him under my poncho, in plastic wrap, through all kinds of weather!
Layer 9 with wrap
The mane and the tail-tip cost me the most effort and took the most time.  Somehow the Apoxie mane accepted pigment differently and was harder to color.  I spent large portions of the 17th and 18th de-painting these areas.  I used rubbing alcohol with Q-tips and microbrushes and a plain brush.  I'd get the hair ends white enough, but somehow the orange I wanted was missing.

I did try a touch of tan Leather Dye, which was exactly the right orange color! (you can see it on his forelock), but it was so tricky to use liquid to blend pastels on Apoxie that I couldn't do a lot with it.  The Pearl Ex tempted me, and I'd paint it on his light places --  so addictive! -- but with each matte spray sealant coat, it'd go duller.  It took several layers to build up a satisfactory metallicism.  Worse, the Pearl Ex seemed to make the white parts get coppery and darker, and then I'd have to start de-painting all over again.  After a couple of rounds of de-painting, I gave up.  Natural bleached ends was going to have to be good enough.
Delightfully, the rump patches that had troubled me earlier were consumed in the ever-darkening layers.
On the 18th I peeled away his blue tapes.  His star had nothing to do with pigments, merely being scraped clean by a knife... !  The stockings started similarly, but needed gesso to cover up some wire armatures that showed through.
I was not ashamed to be using nail polish on his hooves and stockings.  I put on a light spotty coating to enliven the gesso - it gave a living-skin color, texture and protection.  I even used it for his eye whites.  The color was right, a pale translucent-y pink.  I'm ignoring warnings about longevity.  I've painted horses' hooves and eartips with nail polish since the 80s.  I'm only sorry I can't remember the name of the model airplane glue I painted King's hooves with back in 1982 or thereabouts.  It's still there and has lasted far better than anything else.
 The above is from Layer 11:  not really another layer, but what I'm calling the detailing.  The front feet had been used for handling and the hooves had a coating of 'everything.'  I lightened them and added one coat of pink nail polish, and that was it:  I was happy.

Here's a look at the last pastel layer.
Layer 10 Near
This is the famous shot put on FaceBook, which inspired Jennifer to award me NaMoPaiMo Champion of the Day:
Layer 10  Off
I did try Rub-n-Buff when I got to the irises.  This metallic paint has been an old friend forever and I intended to use it when an Akhal Teke was first decided on.  But no.  My Rub-n-Buff tubes had dried up into rock and only hard specks could be got out.  For the eyes I dissolved the specks in rubbing alcohol and then had to add pastel powders, which of course had Pearl Ex in them.  This impossibly custom mix turned out beautifully gold, just what I wanted.  At the moment, two layers of nail polish is required, but I'm reasonably happy with his eyes.

Hah!!  Reasonably!!  I'm bouncing-off-the-walls happy!!  He shines, he shimmers, he's got a head-snapping glow to him.  He's humming with power, he draws all attention to himself.  He's all-a-quiver with life, the kind a newly-finished piece of tack has.  It's a subliminal vibration.  It'll slowly die out, but now while it's fresh I'm loving him so much!!!  Without his compelling deadline to finish I feel lost.  It's always this way.  I am fortunate in that tack wearing, testing and making is right around the corner.

Layer 11 Near Forequarter
I know I said the shape of his mane was a clear indication of my intentions as regards the Akhal Teke's traditional neck jewellery.  Nothing could be easier for a tackmaker who specializes in Silver Parade (since 1979!).  When the time comes I expect making Brasenose something Teke will be do-able.  BUT --- that time has to be right.
Layer 11 Near  Outside  Rail
I have two Silver parade sets to restore before July.  I have at least two pieces of headgear and a saddle I want to make - remember I'm supposed to be making only the pieces I WANT to make?!?  And I've got at least one grandfather saddle in the works too.  As much as possible gets to be squeezed into the three (?) months before May because May and June are basically lost to me.  Every year I promise myself I'll make tack in Colorado.  And every year those two months are the time of great travel and family time, but precious little tackmaking.  Those who cannot learn from the past are doomed, etc.  It's a hard lesson.

I'll finish with a private glimpse of what my horses' lives are like.  You didn't think it wouldn't happen!  Completed hip drops from the restoration of TSII #378.
Next post:  headgear time.

Saturday, February 17, 2018

Brasenose Layers 6, 7 & 8

Layer 8 Near side
When I started this project I knew I had bitten off a mighty hunk to chew.  Pastelling a full 3D Trad is a lot different than a medallion!!  How to get the spray in the right places, not too heavy, not too light?  How to do shading?  How to not muddy things up??  I'm making this color up, I didn't record specific amounts, I'm doing everything by eye... Up to now liver chestnut has never been one of my favorites---

But then...
But then... I got used to walking outside to the barn, rain or snow or dark, to spray him.
But then...  After 3 coats of Pearl Ex a golden glow appeared and hasn't gone away.
But then...  Following my test piece,  altering only in minor ways (plus the Pearl Ex), his ugly stage has been short.
I now know my test medallion came into my possession in March of 2016.  That Jypsi was a bonus from ordering the Mini Rose Khan.  How interesting:  the Khan has been my only Mini Rose to be painted, so far.  O ho, what breed was he?
-- an Akhal Teke.
Layer 8  Off side
Faster and faster this horse, Brasenose, has gone for me.  The test Jypsi went fast, yes.  I was surprised;  the swiftness of her completion was one of the aspects that surprised me.  It shouldn't've but it did.  She was done before I left Tucson.  (I'd love to put her in the Also-Painted of 2018, but she was started in January.)  Brasenose was started on the 10th and already, in 8 days, he's past Layer 8.  I'm doing these posts in short bursts in an attempt to catch some of the magic as it bolts by.  The speed of it, once I finally got down to having a day and a half clear, is as the speed of a racing Akhal Teke.  He's galloping.

Here is Layer 4, in case you're wondering:
Layer 4  Off side
In this shot you can see the rump patches which have caused me some wondering grief.  Somehow I did not get any photos of Layer 5.
This is Layer 6, what I started with today (Saturday the 17th).   I only have 2 shots of 6 and they were both taken outside.  It was a dull overcast day (this is Pennsylvania, what did you expect!) and shows the red effect of the copper Pearl Ex. 
Layer 6 Near, Shot outside
Jypsi the test medallion had only one small test coat of Pearl Ex (on her face), and, as you painters probably know, it all but vanished under the matte sealant.

Always in the back of my mind is the idea of Brasenose under tack.  Naturally I was unable to resist; this is the traditional tack-shooting spot.  He has worn stuff preivously:  a hackamore, a blanket, parts of the Parade Set under restoration on the other space in the room...
Layer 6 Off, Shot outside
After much cogitation I am pretty sure this halter was made by Renee Foust.  But I am not completely certain.  As if I didn't have enough backlogged blog subjects, Brasenose in Tack is another.

Here's Layer 7, back inside again (it is snowing):
Layer 7, Near side
Layers 6, 7 & 8 are building up the middle ranges of his color.  They were mixes of dark brown, red, and what I call fox cinnamon.  I'm currently following Rachel Mitchell's advice about adding Pearl Ex to every layer, but I'm also putting on Pearl Ex by itself on the lighter parts:  the gaskin area, the neck, the end of the tail, parts of the face etc.
The face is the hardest, by far.  It's clear that there are simply years involved in learning to paint a Trad scale face.  The only thing I knew was that I wanted a bronze nose, but until today I didn't know how much of one.
Layer 7  Off side
As I write this, Layer 9 is drying, with its darker saddle areas.  He's going like the wind.  I feel that another dark layer will see me to such details as stockings and eyes.  That's for another, fresher time.
Layer 8 Near side
Right now I'm so astounded I've made it this far on this exquisite creature it will be a wonder if I get to sleep tonight.

Tuesday, February 13, 2018

Brasenose Layer 3

Layer 3 Near side
This NaMoPaiMo has been the most fun.  I just sprayed his third layer - in the rain!!  Hurray for ponchos!!  Yes, it was raining, but that wasn't going to stop me.  I picked him up using a sheet of plastic wrap.  This is what contributed to Jypsi's drop:  I hadn't figured out how to carry a freshly-pastelled model right before spraying.  Cuddled the flashlight (it was after dark) and the horse under my poncho, went outside (purple light:  my poncho is purple) and opened the storage barn.  Stood him up and went back for the Krylon.  (Another hard lesson:  don't carry everything at once!)  I wear gloves and a mask for this operation.  I wound up leaving the flashlight in one place and holding the horse in my left hand.  Experience helps but I have SO far to go.
In case you're wondering how he'll dry, I bring him back inside after about 15 or 20 minutes and let him rise to room temperature and humidity.  So far there hasn't been any problem with the sealant...
Layer 3 Off side
This is not to say he hasn't had problems.  He has, and rather big ones.  Reaching Layer 3 has been a process of realizing I'm an impatient cuss and that my test piece had by no means used up my mistakes!!  Hah, hah, hahh!!  How right I was in thinking this horse would teach me some more... 
Just one of my issues is working with the Pearl Ex.  It mixes in the color and goes on easily enough, but my spray seems to mute it back out.  I've got a few ideas...

Yesterday (the 10th) I accepted the gracious invitation of Kristian Beverly and her mother to spend a few hours in their home at my very first NaMoPaiMo painting party!  I can hardly tell you what an honor that was.  I had never been in their home before and only knew Kristian a little.  I'd sold her a horse and some lace and bought one of her saddles (and read her blog), but that was about it -!   Other attendees were Zoe Hatgi whom I was delighted to meet (at last, a body to the name of a Guide customer), Maddie Klein who had visited me once, and Lizzy Mace, a friend of Kristian's.  Like myself, Zoe had driven for an hour+ to be there.  For me that distance was 85 miles.
Kristian Beverly; Lizzy Mace behind lamp
The Beverlys have a room just for craft projects, and this was it.  I was impressed.  My own tack room is not big enough for more than 2 people.
 Everyone was painting in different ways, but we all had one thing in common:  tack!!  Four of these 5 were tackmakers and the table was soon covered with "the glorious mess" (Jennifer Buxton's phrase) of tack.  There are a couple of very talented English saddle makers here, Kristian and Zoe.  I was enchanted.  These girls are zooming ahead with their skills and experience.  They're already at the stage where their English saddles are better than mine.  I had brought some of the saddles I'd taken to Tucson just last week (and shown to Rachel Mitchell).  Fact is, I hadn't had time to unpack them.
Maddie Klein; Zoe Hatgi with glove

The painting party was my first opportunity to put color on Brasenose.  It's true I'd planned on starting him the day before, Friday the 9th, the day after I was supposed to get back from Tucson.  But Chicago O'Hare Airport (ORD) had other ideas!!  For one of the few times in my life, my flight was cancelled.  I had successfully made the Tucson to Chicago hop and was quite confident (veteran weather radar reader) that my flight from Chicago to State College could easily evade the coming storm.  NOPE!!!  For more than 24 hours I was delayed - and a flight that was supposed to leave at 6:50pm didn't make it out until after 9.  And that was with seven (7) gate changes.  If you're going to break a record, you might as well smash it to pieces.  All that fuss for what turned out to be a mere 3 inches of snow!!!  

In their defense, afterwards, Geo told me that just a few miles to the south there had been 8 inches and more of snow.  If that had fallen on O'Hare their extreme measures would've been more defensible.  As it was I was nobly trying to reserve judgement, and having a blast exploring O'Hare.  I found a garden, a yoga room, and pet relief stations (which were very uninteresting).  I rode the tram to the International Terminal (and had to wait while snow was cleared from the tram tracks).  I put in a tremendous amount of work on my next cross stitch saddle blanket.  Eerily, I saw absolutely no one else doing any kind of stitchery or handicraft at the airport, all day.

Layer 1 showing *Bask scar
Applying Layer 1 to Brasenose was both satisfying and mortifying.  Progress at last!!!   When I was nearly done (using Q-tips to pastel with, something learned from my test medallion), I discovered I had done a much poorer job of prepping than I'd thought.  Several pinholes appeared (acceptable).  Several rough surfaces came up (barely acceptable).  The places on his rump where Margarita had patched him turned out not to be smooth (yikes).  But worst of all -- how had I missed it? -- he had a scar.
Layer 1 showing *Bask scar
There was a molding discontinuity along his off side, a double straight line from neck to haunch.  When I first saw it I thought of *Bask's scar from his sea voyage, mentioned in Marian Carpenter's book Arabian Legends.  (I've never seen this scar.)  From then on I was calling it his *Bask scar.  I hated to stop painting, but this was serious.  After a tense time I knew I could not just accept it, --- and started sanding.  At first with my own sandpaper, later with sanding sticks borrowed from Zoe and sandpaper borrowed from Kristian (where would we be without friends?), I made progress.
Layer 1 post scar
I was actually able to remove 90% of that scar.  In places I got down to the resin.
Layer 1 post scar
But then I just pastelled him up again.
Layer 1 Off side
 I couldn't see how to re-prime on top of Layer 1.   Let's face it, I was way too pent-up not to paint and I was at my first painting party.  I couldn't not paint.  I confess, too, that my strongest excuse was that he was headed for a liver chestnut and these patches would become so dark as to hide anything out of the ordinary.  There just comes a time when my own bullheaded stubbornness carries me forward.  I guess I'm not a Taurean for nothing.
This is what Brasenose looked like at the end of the painting party.
Mrs Beverly literally sent me home with a supper -- thank you!!
Layer 2, end of painting party

The next day was Sunday the 11th, and we stayed home.  We both very much wanted to stay home AND it was raining.  Progress was made:  my camera captured two more layers on my little Teke.   My memory also tells me 2 layers were done this day.  Mysteriously my notes depicted only one more, making a total of 3.  I dealt with this discrepancy by labelling the first Sunday one "Layer 2.5."
Layer 2.5 Near side
On this layer, inspired by the party, I abandoned the Q-tips and went back to a brush, but this time a short wide thick brush.  It really helped.
Also, entirely on my own, I added the blue tape boots.  They are to be his stockings as well as handholds.  He also has a star, not visible in these shots.
Layer 2.5 Off side
Here we see the patches on the off side slowly becoming less of a blemish.  It's not perfect, heaven knows.  I am struggling with several aspects of this paintjob and that's merely the most obvious.
On Layer 3 I started putting gray shading on his face, mane & tail and knees & hocks.  I was using a microbrush for this, yet another giftie from the painting party.
Layer 3 Off side
 You can see that as of Layer 3, his rump patches are turning out "somewhat" successful.  I wouldn't exactly recommend it. 
Layer 3 Near side
 My pastels are named Jack Richeson Fine Oil.  They were on sale at Uncle Eli's, the specialty art store that's been in State College since before I got here.  It's grand to live in a University town.  It's not grand to be such a beginner on such a beautiful model and have so many mistakes to work through.  I guess I'm just like any other artist.

Thanks to Jennifer for thinking up this wild idea.  I'm having the most fun.