This is the second of the 3 parts of Fancy's Hackamore, and I am again up against a wall. You'd think a plain tied-brow headstall would be simple! The phrase "in as much detail as I could manage" again translates to: some parts will get more detailed descriptions than others. Which ones depends on my photography (haphazard), my skills at describing (chancy), and my wishes to save something for later. Not only is some of this model tackmaking quite difficult, some of these steps are near-impossible to depict in
any format. Only personal experience will show you everything that went into it.
Having said that, once more I am amazed at how much
is here.
These pictures show a "holder" bosal, a plain sinew one (that was used for the Guide). It is NOT the one Fancy's Hackamore winds up with, nor is it anything like the original 2005 one. That bosal will be the subject of the last post in the series. So hang on! This chapter is all about the headstall.

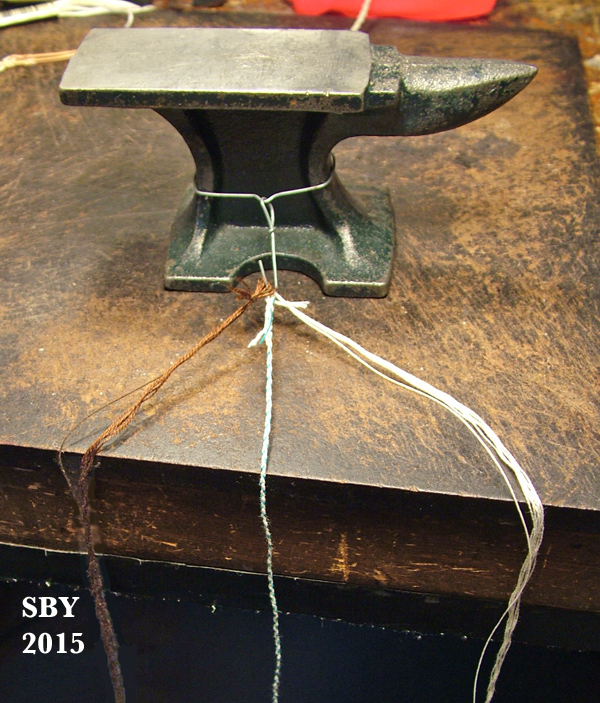
Simple, remember? What we see here are all the leather lace parts involved. From top to bottom: crown strap, off cheekstrap, near cheekstrap, and two throatlatches (mass production is lucrative). The buckles were made, as are all important headgear ones at the TSII, out of handtwisted stainless steel wire. I use 26 ga. doubled. They slide beautifully and they don't corrode. Fixing the ends (to a double-looped S buckle) requires a deal of fiddling, as you have to secure each wire separately. That's 4 wire ends per buckle. You'd better have a trusty pair of pliers; it's always right on the edge of what I can manage to do, to fold over such tiny ends and bend them down so they don't snag. If the twisted-wire is not untwisted at the fold points, and separately secured (as two wires, side by side), it bulks up too large.

Fancy's Hackamore features braided-button-and-slit fastenings on the cheekstraps. This exact method was only invented a month earlier, on Grieve's Roper, June of 2005 (yeeks, I didn't know that!! looked it up just now)(so Fancy's is important yet again!), after many variations over the previous 5 years, going back to 2001. Oh the chapters I could write on this - !! -- someday!!
Button-and-slit solved a bazillion problems. It could be opened, thus making bit exchange possible (though only by the nimble fingered); it looked suitably Old West and realistic; it blended beautifully with braidwork; it saved space; and it was relatively easy for me to make, rendering it repeatable. Repeatable and thoroughly TSII: having finally evolved into the sweet spot of perfection, it remains our standard bit-to-cheek fastening today. I've used it for the past 10 years and hope to always.
Basically it is 4 heavy threads tied in two Crowns and a Wall: Undercrown, Overcrown, Wall. The threads are fed through 2 small needle-chiseled slits about 5mm apart.
A smidgeon (about 4 passes) of 4-strand braid is necessary to provide a kind of neck. I did that part with a hemostat holding everything together, hung off the braiding anchor.
No, that button, technically an end knot, doesn't have to be perfect. It usually isn't. The trick is 2 Undercrowns, and to do the button before the slit. That way you know where to put the slit.
Fingernails really help. And Fray-Chek : ) without which my model tack would not last half so well. Once set, button-and-slit will not budge, another benefit.
Now we bound ahead, to the decoration of the headstall. Fancy's design was unique, even though I'd been doing flat braiding since 1995.
There was nothing really new in the buttons themselves, Spanish Ring Knots (3P5B) and Pineapples with single Interweaves (5P4B with 1 IW), nor even their colors, turquoise, white and dark brown. I had used this combination on Malaguena's back in 1995 and it was a roaring success. What was new with Fancy's was the arrangement of the contrasts: realizing that the dark brown and the turquoise were equal in terms of intensity, and simpy swapping them across the IWs and the edge SRKs.
I don't know where this idea came from. Nothing quite like it is in evidence in all my previous 10 years of model braidwork, across dozens of pieces. It's part of the magic of Fancy's Hackamore, I guess.
No pictures were taken of me setting the silver beads. The lace is split in place, with a needle chisel, and the beads are set on one by one. They are opened by mashing them end-down on the blunt awl, then closed with the needlenose pliers. Careful work is needed to smoothe down any raised edges, so as not to scratch, and to set the edges on the inside, where they don't show. As I was setting them, 10-year-old memories arose, telling me to cut and file some of them smaller (the round beads), to fit the smaller gauge of leather. These silver beads were obtained at the Gem Show in Tucson, as necklace makings. Their origin is overseas.
The idea of using Hill Tribes Silver miniature beads in parallel rows would be used again in 2007, with Jennifer Buxton's Green Braided Set:
Yes, it is real silver, because it tarnishes.
On to the browband tassels.
Making tassels is described in the Guide... and we've already covered it in the mecates for Fancy's. But here goes again. Six strands of dental floss are fed through the slit holes,
then waxed thread is fed through the slits once,
to help prevent slide-off. Two half hitches are tied to hold the floss in position. Using this tied thread as a core, a Pineapple with 1 ring IW in self is braided on.
The clamp holds the other half of the browband out of the way.
The interweave rings are put on in turquoise heavy thread, using a blunt needle.
It is pretty slippery, so care is needed to prevent the braided button sliding right off. Tighten and finish. Wah--hooh, the browband is done. Assemble the headstall and enjoy!
The throatlatch is extra long, partly because the original Fancy's was, and partly so folks can cut it to their own preference. I tuck the end up into the headstall and browband rather than cut it short, but that's personal usage.
In other news: BreyerFest was a whopping success!! Thank you Erin: it's a fabulous saddle and I love it!! Thank you Heather, Ann and Eleanor: every minute was wonderful. Thank you Heather Wells for the BHR Buffalo; now I'm gonna have to post something on him. He brings my Buffalo Conga up to 10. And I finally sold my Matinee Idol, featured on this blog (August 2014). Kudos to all the newcomers - may your horses bring you great joy!
My
Quelle Surprise was the matte Appy. I would trade him for a glossy Appy, if there are any out there willing. I had originally wanted the Perlino but find myself changing my mind as the Appy grows on me. My
Ganache is up for trade for a
Haute Couture. Perhaps I can come up with something extra to make this deal more attractive.
Thanks to everyone for offering on Fancy's Hackamore! and to those patiently waiting, still, for me to finish the last 2 Lottery winners...