
By the 16th week, two collars and two pairs of hames had been made for the lead pair of the Twenty. This post will examine these most challenging parts of a miniature harness. Strictly speaking, collar instruction belongs in the Guide; we'll show half a dozen collar pictures here. But wooden hames are not in the Guide, and I'm pretty proud of these babies. This is a long post with lots of details!
By the 13th week, I had solved the 1:18th scale working farm harness collars worn by the mules. Soft stretchy leather was critical. The white buckstitching, done with waxed linen thread, is hand sewn and spaced by eye. (Note the birch strips in the background.)
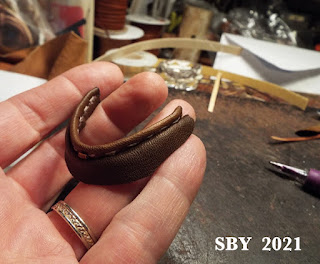


Stuffing for these collars was those thin strips. At these scales one strip did most of the job; only the swells and shoulders needed a couple more little pieces. No need to bevel, just cut to fit. (There is a wire inside the rim, as in all our collars.)
Note the sewn-in keeper at the front center or throat of the collar. There was not space for two keepers (as with most Trad scale collars.) This keeper is critical for the hame strap. It holds the hames in place, and thus the whole harness. Of course no such thing exists in real life, but that's model collars for you. At these scales the slipperyness is vast and the pressures necessary to position the hames mean no alternative but permanent gluing,... which I detest.


Do you remember my Snowshoes?! There is a blog post about making them: Creating the Snowshoes.


Paper patterns are de riguer in my tack shop. I planned to use three thicknesses of wood for each hame, a decision dictated by scale. (Okay, by snowshoe experience.) That meant that I had to be clever about flipping the pattern for cutting them out, since there was adhesive on only one side of the wood strips,... and since there could not be adhesive on the outside of the hame. Fortunately with these hames, right and left did not matter.

Can you guess the solution? Two blanks to make a sandwich and the third coming down on the top of that sandwich. This would leave wood-side-out on both sides.
Here are all four right after the hot-gluing stage.

Next was filing and sanding. A lot.

By the 9th of October, the hames looked like this. Modelmaking sleight-of-eye is responsible for reducing the number of slits, and rings!, from 3 to 2. There was not room for 3; and one of those 3 was not used anyway [in the references].
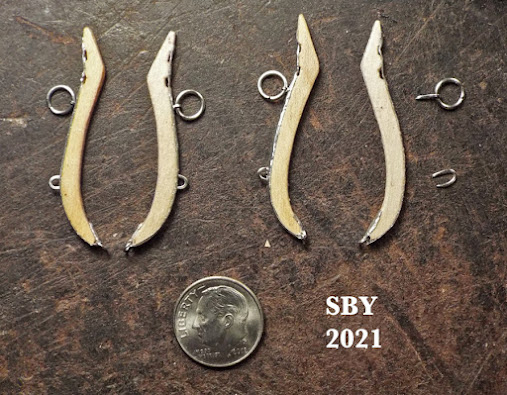
Yup, remember friction? Those pins and staples (made from wire) were press-fitted. Alas, this is another model harness where actual traction would probably break everything. This weakness is contrary to my principles but made necessary by the level of detail I am using. You have to draw the line somewhere. God forbid they suddenly come to life and actually start pulling. The only real strength the harness has to have is to survive its own making and to be able to be installed on the mules, i.e. strap-tightening and adjusting. I am somewhat worried about those lower hame clips. Only silver tape holds them on.
Making 1:18th hame straps was an exercise in some of the smallest buckles I have ever built, using 26ga wire. The keepers were managed by using punched rounds of leather from my hole puncher.

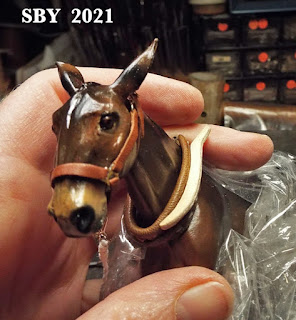
As a reminder of just how small these mules are, here's a shot of my Suerat with them.

As is usual for blogging, the tack pieces have progressed quite a bit further than shown. Next up: Traces and Bodies.
No comments:
Post a Comment