Friday, July 5, 2013

How the Timaru Star II got its name

On a recent trip to Boulder, Colorado to see my parents, Mom dug up some old slides, and we all gathered round for a trip down memory lane.  I've been meaning to blog about this story for years, and now's my chance!

What you're looking at in the background is the famous Golden Gate Bridge of San Francisco.  No mystery there -- standard tourist fare.  Ah but the YEAR... is 1973!!!  The woman on the right is Jeanne Bensema, and her daughter is thirteen-year-old Susie Bensema, already smitten with things of the sea, and of the imagination.

What were Boulderites doing in San Francisco?  My father, Bill Bensema, had been invited to WesCon -- an early convention for electronics and electrical engineers.  In his inimitable way he turned it into a family vacation; however, only one child came along.  Two others, a younger sister and still younger brother, had to stay behind in Boulder.

We stayed at the Beresford Hotel.  I can still remember the red carpet everywhere.  There was a tiny restaurant next door called the White Horse.  Since I was horsemad this was a brilliant stroke of serendipity.

We went to Chinatown.  This was my first experience with a big city that wasn't Denver.  [Editor's note:  not quite true, there was Tucson.]  It was at this time I learned to eat with chopsticks.
Clearly most of the pictures (usually slides back then) were taken by Dad.  However this one is of Dad, so it must have been taken by my mother.


This man is not Dad, but Reverend Bob Stewart, a friend of the family we dropped in on.  Actually he was the man who married Mom and Dad, so in a very real way, if it weren't for him I wouldn't be around!
Don't you love those old fashioned cars...
We went to the beach, of course.  For Coloradans, anything to do with the sea was quite romantic.  Dad has always had a sailing streak in him.  I think it was that which led us down to saunter along the marinas and docks.

I don't recall anything particular about which park this was.  I do remember a whaling ship museum aboard an old wooden whaler named the Balclutha.  Alas, the above wooden ship is not that one.  We wandered along the docks, spellbound all three...
...and what should we stumble upon but a cargo ship in the very act of unloading!
We wandered closer and watched.
If he's interested, Dad can strike up a conversation with anyone.  I'm not sure how it happened, but he started talking with the crew, and we found out this ship was the very one which had carried our good friends and neighbors, the Walter Jones family (Walter, Carlie, Connie, Shannon and Scott) and their goods, to Christchurch New Zealand earlier that year.  That was certainly enough to capture our attention!  Connie had been my best friend before 6th grade.

I was swept away by the romance of ships.  To be able to sail anywhere in the world... free upon the high seas...  safe...  to be doing good for others...

More than twenty years later I would find out that the White Star line named all its ships with a city name followed by the word 'star.'  Sister ships to this one included the Perth Star.  The city of Timaru is on the south side of South Island, New Zealand.  The name itself (again, it took me more than 20 years to find this out) is a Maori (Polynesian) place name for the harbor there.  Te Maru means 'safe harbor,' indicating that was the only safe place to land along the coast.

 This particular slide causes my spine to chill up, because it proves Dad was actually walking on board the Timaru Star.  I have only the dimmest memory of walking on her myself, but this slide means it actually happened.
We wandered all over that day, peering into the warehouse and looking at the boats.  I don't remember much about the rest of that trip, but the die was cast.  This simple dockside encounter would start something that lasted far longer than anyone could imagine.

Sometime in the next year, influenced by a couple of other events --reading a book called "The Great Ice Ship Bear" and playing a game called When My Ship Comes In with my new best friend Gretchen Lockwood (I met her when we were both 14) -- I settled in my mind what MY ship would be like when it came in.  It would be magical, an icebreaker.  (Icebreakers took on a symbolic meaning for me: one who could conquer problems, pioneer a way through.)  It could sail anywhere; it had a model horse stable and tack shop in the hold; and it would be named after the Timaru Star.  I added a "II" or "the second" to distinguish my ship from the original real one I had seen that day in 1973.  Much later, when the time came to actually launch my model tack shop as a mail order business -- in 1979 -- I remembered that magical ship.  I wrote short stories about her, and one of them was published in Just About Horses in 1983.
But that's another story.

And so was born the TSII.  No one could have foreseen that a schoolchild's imagination would last longer than an iron cargo ship.  The Timaru Star was scrapped in the mid-1980s.  Just about the time my tackshop was getting off the ground.  (I like to think her spirit passed into it.)  To my surprise, a second Timaru Star was built in the 2000s, and it is sailing today -- a supertanker based out of Hong Kong.  Why did they keep the name alive?  I have no idea, we don't know for sure... but I like to think my little tack shop had something to do with it.. a subliminal influence, perhaps.  By then the Web was up and running, and my ideas and use of the name would appear in any search engine.

Who can say.  One thing's for sure.  I will always love ships and sailing, always have a romance with the sea, and always respect the power of imagination.

Dreams can come true.


Wednesday, May 1, 2013

Goehring Breastcollar engraved

 Yesterday I finished engraving the silver for the Goehring breastcollar.  I had no idea it would take so long, or be so hard!   I started making these pieces back in mid-March, but the engraving has taken all of this past week.


 For those of you wondering why I don't do an entire Parade Set in this fashion, this picture will perhaps give you a clue.  Every single one of these little doohickies has had its Thermo-Loc individually softened in the microwave (an art in itself; prying the sticky stuff off a broken saucer takes patience unholy).  And then the silver piece (filed, soldered, shaped) is pressed down in, not too far, not too lightly, and the cube squared so it will fit in the vise.  Then cooled.  Many of them have to be cut, with the XActo, to a more square shape.  And even then the silver doesn't always stay in place.  We had one concho that didn't stick and had to be reset... twice...(it's the bottom-most one.)

Tons of work.


This picture shows, albeit somewhat out of focus, the blade of the engraver I'm using.  Ninety percent of my engraving is done with this one graver, a size 37.  It's a lot like tooling leather, where one beveller does ninety percent of the job.  I still have to strop and polish the end practically non-stop.  Metal dulls an edge so much faster than leather.
We are actually making progress on this beast of a breastcollar!!  I'm sticking the finished conchos onto a fresh piece of tape.
This next picture shows, possibly for the first time, the most important aspect of my tack shop.  It's my tack notebook.  I've kept them since I first started making tack back in 1979.  There are about ten of them by now, all in this small format.  Kept in longhand, they try to document, from my own point of view, HOW I DID IT: what steps were taken with what, how and when.  They are peppered with small drawings, this page unusually so:  I was working out the design for the central plate of the breastcollar.


This is how my engraving starts: with rocker-edging around the border and around the central star.  And then I draw on the surface, with a blunt awl, where I want the lines, or tooling, to be.

 The next step is to gouge the lines, using a triangular graver.  It's analagous to the cutting phase of tooling leather.

 Here we see the next step.  By some standards this is crude, the work of a beginner.  But at this scale, it looks impressive enough.  One is supposed to hold the graver in the right hand and not move that hand, but rotate the vise in the left hand.  But at this scale, I find I move and twist both hands equally, a sort of combo of leather tooling wrist action and engraving proper.  If properly sharpened the graver cuts smoothly and easily.  You can see the bits of cut-off silver lying around.
 The final steps are to enhance and elaborate upon the plain 'bright' engraving.  This is like the decorative cuts phase of leather carving.  Truth be told, I'm still learning and inventing in this phase.  My ability to keep my gravers sharp is lousy... you may have noticed a few lines across things, sign of a slipped blade!  Another reason for elaboration:  it hides the lines. 
 This is the largest piece and thus easiest to see everything that is going on.  The smaller pieces I did first, figuring I was practicing and any mistakes would show much less!  But in fact getting through even 26 conchos was not practice enough.  The whole thing feels much like learning to tool:  it will take years.   Ah but I'm happy here.  The slow steady improvement of the skill and the sheer beauty of the result is enough.


This is a good place to remind everyone I will be traveling for the next 6 weeks.  Email is available but not, I don't think, blogging.  Wish me luck, and hope I get more work done on this set!   See you at NAN...!


Friday, April 26, 2013

Spring colors

It's amazing how I seem to have a backlog of blog subjects right before I go into a long period of no posts.  Forgive me.  I promised to post on this fantastic Gaming Saddle when I got it, and I've been enjoying it ever since it arrived.
This beauty is none other than the Aqua Gaming Set made by Shannon Granger of Riversong Saddlery!

When I saw it I just lusted after it.  I'd seen Shannon's work before, in the hands of other discriminating model tack collectors (y'know, if they collect model tack they must be discriminating!) and admired her sense of proportion.  Many model saddles look like lumps.  A few manage to look like miniatures.  Detail is king, and a good part of that detail, besides crisp edges, beautiful tooling and correct hardware, is proportion:  getting the sizes of the parts right, and their relation to one another.  Shannon's saddles really attain that much-desired description:  "it looks like a real saddle only smaller."  My own saddles have not always done this.


For one thing, at first I thought the horn was too small.  But then I realized real saddles have these little horns.  My own model saddles just have large horns, something probably from pride as much as skill.  (Makes you reflect upon the large-headed big-eyed baby phenomenon.)

I decided I had to have the Aqua Set, though with some trepidation.  Surely others would want this just as much as I.  The way color was intregrated into the set was something I can really appreciate, executed with dash and verve: not too much, not too little.  I was in a circumstance where I wasn't making much tack, so I chose to collect instead.  Difficult choice, but I've always wanted a Granger.  I could afford only one.  When the set was actually in my hands, I spotted a tiny error: the flower centers on the front corners shouldn't have been painted blue.  But then I started thinking about the Navajo injunction against perfection in handiwork.  They believed perfection was an affront to the spirits.  If Shannon had painted every center it would be too gaudy.  Imperfect?  Fine by me.

This third shot is a lesson in PhotoShop.  Even though I took out a great deal of blue in the first two pix, I didn't take enough. 
This angle shows how green everything really is:  the great Gallery Pear tree next to our house is blooming.  Oh it is grand to be outside shooting in the old place on the railings once again!  This tree has been the backdrop to most of my shots since we got the house in 1993.

Embarrassingly, the horse doesn't have a name.  I'm taking her (mine's a her) with me to Colorado and points west.  Maybe she'll find her destiny.  Certainly I'll work on getting a better blanket!  I tried this set on everybody, but a plain white pad and this horse worked the best by far.

More than half my tack collection is other people's tack.   What's really interesting is that this color combination on a Western saddle, natural undyed paired with a turquoise or aqua seat, is already represented in my collection.  It must be one of those things, like cranberries with white chocolate. Here is my Susan Taylor gaming saddle, one of two Taylors I own.

I commissioned it from her in 2002.  The bridle is from Donna Looman.  When I saw those little turquoise tube beads I leapt.  The blanket here is by me, specifically for this set.

Also I have made, myself, at least one saddle in this color combo, TSII #416, back in 2000.  It was built for Elizabeth Bouras.  Today it is in the hands of (I think) Colette Robertson.

This is, of course, a digital photo of a film photo.  That's my carpet behind the top corner.   Yes, I have a scanner, but it's been unused for many years; I'd have to seriously sit down with it and my computer guru.   I dragged this photo out of my scrapbooks.  I have scads of scrapbooks (yes, that is the correct term).  Only time will tell whether they'll ever get published.

Thursday, April 18, 2013

Goehring's Reins

At long last, the reins to the Clyde Goehring set are finished!!  The best words I've found for them are 'barbaric Mexican flamboyant style.'  A friend promptly said I could never make anything too barbaric or flamboyant.  Hah.  But since it's a portrait piece, I rest my case.

These beasties have been under construction for several weeks.  It's not their fault that my tackmaking this spring has been slowed down to nearly a full stop.  Only recently, and through a lot of hard work!! have I been able to make any progress at all.  Many parts of these reins had to be done three times over to get them right!  For instance, d'you remember the twist?
(No, that is not a dance question!)
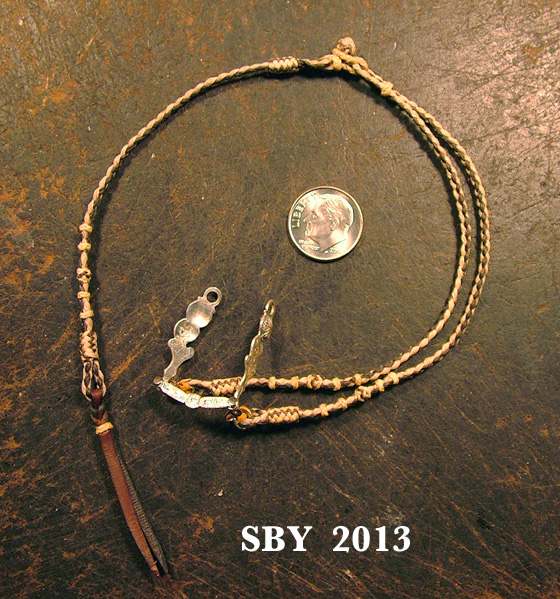
This was what the rein bases looked like when I first tried to make them.  It took three tries to overcome the dreadful spin or turn.  I unbraided them and started over again, once... twice...  What finally worked was to pull much harder with my right hand, while pulling 'normally' with my left.  Under these conditions, the reins eventually came out very straight:  the romal part with no twist, and the hand part (called 'riendas') with a quarter twist in 13 inches, which I felt was acceptable.

Another part I had to do three times over was the central button in the groups, a Pineapple with a single Interweave.  Sounds simple, but it wasn't.  I was so out of practice I forgot my own recipes and procedures, and it took 3 tries to 'rediscover' normal.  The first try the core was too big; the second, I used the wrong thread...  Cores to these are merely three half hitches of a smaller gauge thread, something I'd forgotten.

The large zigzag buttons used on these reins are called 'crazy' buttons.  Technically
the formulas used are classed as Gaucho Fan buttons, and Tom Hall names it a 10P 8B Checkered Headhunter's. 
Right. 
I'm gonna continue to call them crazy buttons... 
I rarely use them, despite their being fun and interesting.  The last time I did was on a pair of reins for K. Smith, in 2007.  Before that, I have only used them on my own Malaguena's FiB RiB [fully braided rawhide bridle], and that because it was a mere doubling; I didn't know how to do interweaves then.

On one of these turnback buttons, the long ones next to the bit, I had to rebraid the dark brown after the white was finished.  This was the first time I'd tried such a trick: pulling out the dark brown without disturbing the existing white button.  Amazingly, it worked.


 I am so pleased to have made progress, any progress at all, that I'm not thinking about what comes next.  But it'll probably be the breastcollar.  I have a bare 2 weeks before I skip town.  It's possible I could get further on this piece.  What I should do is design kits for myself, for my remaining Nine Orders, kits I could start on while I was traveling.  See our Tack Orders page on my website for more information.

Let's take a look at the full scale version of what these reins are a portrait of:
The reins are hard to see, for there is much here to look at.  One saving grace for this model tackmaker is the ability to narrowly focus down on just one feature.  I've done the bit and I've done the reins.  I'm partway through the breastcollar.  The bridle should naturally follow.  I have ideas now on how to do the checkers along the skirts; and engraving is a skill I humbly possess.  But as to the rest of it, well, only time will tell.  I'm gonna have to uncork some serious design and engineering mojo to get through it all.
More pictures are on my website.

This layout shows the side of the bit shanks. 

This is the first bridle I've made where the reins have wear leathers on the turnback loops.  I confess the picture color didn't come out quite right, and the wear leathers are not really so bright orange.  They're actually much more subdued and natural-colored, like the reins themselves.  I used very thin skiver and hand-sewed them in place.

A reminder:  I will be visiting family and friends in Kansas and Colorado from May 2 to June 17.  If there aren't any blog posts for May and June that's why.  If I could make tons of tack on trips I would, but my history is against me.  I find it difficult to sell copies of the Guide when I'm on the road, so your patience is appreciated.  I look forward to returning with plenty of travel tales!  (sorry, no canoe this time!)
And I'm looking forward to NAN, and beyond it, BreyerFest!!

Sunday, April 14, 2013

Rinker on the Scuppernong

You may have heard that I take model horses on canoe trips.  Sit back and take a trip down the Chowan and Scuppernong rivers with me -- I promise you won't get seasick.  :)

Over the first weekend in April my husband and I went on a 4-day much-needed "getaway" vacation, having lost our normal spring break to circumstances beyond our control.  We decided to go canoeing in North Carolina.
New River satellite boat launch on the Chowan
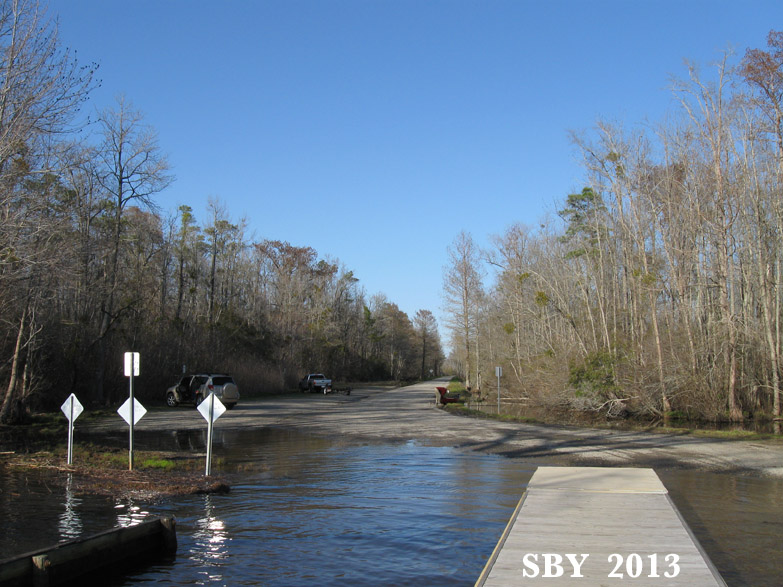
This shot is actually of our second day's end, but it is a typical example of the location of our adventures:  a dirt road and parking lot with maybe one other boater, a plain asphalt/dirt boat ramp, and a small dock with no railing.  Somewhat less typical is the fact that the water is up over the road and very nearly over the dock end.  There had been lots of rain and a strong wind.  Not a problem.  We just went around to the right and up the ditch, which was flooded.  In the center of the picture you can see me (red jacket) bending over to the ditch, and that's our car just behind the white signs.

Chowan River
The weather was spectacular for the sport: not too hot, not too windy.  There are no insects while you're on the water, something most folks forget.  The Chowan is located in northeast North Carolina, on the Albemarle Sound, which eventually reaches the Chesapeake Bay.
Bald cypress
We see some incredible sights while 'slack-water paddling.'  Want to guess how old this cypress tree is?  At least a hundred years and quite likely a lot older.  This was one of the biggest we saw, but there were many others.  At this time of year they are just getting ready to bloom and leaf out.

Mouth of the Sarem off the Chowan
Here we are leaving the more open parts of the Chowan and making off into one of the side creeks, the Sarem.  Truth is, these pictures were taken by my husband, GSY.  I fixed the lower shots' signatures but not these.
Typical bank of the Sarem
When I'm canoeing, time stands still.  I pass into a trance, a dream.  Nothing happens except the banks flow by, and I rest between every stroke of the paddle.  Canoeing is for people who like to watch movies in slow motion.  It's also a supreme test of companionship.  It may take years to learn this apparently simple skill, but you can take it as deep as you want.

This shot shows a normal stretch of the side creek bank.  We might see Nutria or squirrels, and we do see many kinds of birds:  Yellow rumped Warblers, Chickadees, Titmice, Kinglets, Downy Woodpeckers, Osprey, Bald Eagles, Great Blue Herons, Wood Ducks.

On the third day, we choose to paddle the Scuppernong River, starting one mile below Columbia Visitor Center (the Red Wolf Visitor Center) and then turning up one of its sidecreeks, named First Creek.  We got deeper and deeper into the forest, and the stream got smaller and smaller.  One never knows what will stop you:  a fallen log, a beaver dam, a bush growing in the stream.  Yesterday it was a beaver dam.  Today, after 5 hours (we measure canoeing by hours, not miles), it was a fallen log, and what a huge one: it spanned from bank to bank.  There was no possibility of going further.  Almost without thinking, I pulled out my horse, who had been traveling all this time in his Pony Pocket tucked in the bow (thank you Lori!!!!), stripped off his blanket and put him on the log.  He can swim, he's waterproof.

Then, something incredible started happening.  My husband, who virtually never photographed a model horse in his life, began snapping away.
I did not have time to fret that Rinker was unfinished.  His 'wild' side, the more chestnut side, proved easier to shoot, being darker.
We gently moved away to get a better shot.  The log is very stable and wide, he's not wobbling at all, and there's no wind.
Yes, I have let them swim, occasionally, at the side of the canoe.  Usually without tack, of course.  This particular bridle is the one I just bought from Danielle Hart.  In the event, it escaped any damage.
We got further and further out, trying for better and better shots, and...

Suddenly... we saw something we never would have seen otherwise!
Rinker's reflection!

Oh, gotta get this, gotta get this one...
Perfect!!

Pretty good for a guy who never shot a horse before!

The story ends with this more prosaic shot, showing what the typical daytime canoe trip view is (at least for the stern paddler).  We went back and picked up the horse, and made our way home.  I guess it proves I'd rather play with Rinker, even when he's not finished.  He does not need to be perfect, only to be there.

 I still haven't ever seen a horse like him.

And we arrived home rested, refreshed and ready once more to take on the world.


Thursday, April 4, 2013

Blanket Kit

This is my Blanket Kit.  It's about the size of a sandwich.  In fact this is a sandwich box.  The brand name of the box is Lock-N-Lock, and our grocery store carried them (in many sizes) for about a year starting in 2010.  Then, they went quietly out of stock.
Now you see that pretty little black-and-white pattern medallion is something that's already on the blanket blank.  I gotta confess:  I pinched it from my Mom-in-law.  I wanted some Aida cloth and this was all she had in the right count.  I felt the medallion was too pretty to wreck -- it's Hardanger embroidery -- so I'm planning to incorporate it into the saddle blanket pattern, somehow.  Yeah, it won't show under a saddle, but at least it'll be there!!

The paper pattern (with the paper clip) is, of course, from Chris Anderson's excellent book/CD of saddle blanket patterns.
What a great place for my old pliers, who managed to get themselves retired from active tack work by cracking at the base of one of the jaws.  Metal fatigue.  But oh, they've been through so much with me.  Other tackmakers may sympathize...  I need pliers to pull the needle through sometimes, such as at the ending of a length of floss.  They're strong enough for that.  And hey-presto, they fit in the box.

And isn't that the cutest little pincushion--!!??  It's supposed to be a tomato.  It's filled with fine sand.  Got it from my own mom.

The neat thing about a blanket kit like this is I can carry it anywhere.  It rides in the bottom of the backpack, and believe me, it's travelled.  This box has been to Europe, to Florida, to Colorado, to Arizona.  I sat in Philadelphia Airport working on the Mint O'odham blanket with this thing.  What it's taught me is the value of an isolated, portable piece of tack:  one that is socially acceptable... oh those loaded words!

I've made a lot of blankets over the years this way. 

You may notice some small progress being made on the Clyde Goehring breastcollar.  Here is a better Sneak Peek:
Yes, that's actually leather.  Although the packing tape reflects light pretty badly, you can still see that half the silver pieces now have their loops soldered on.  Slowly we forge ahead.

Sunday, March 17, 2013

Mint O'odham plus

It seems to take me about 9 months to make a cross stitch blanket.  This saddle blanket was begun somewhere in late June or early July of last year, 2012... and finished just a few days ago.  I didn't think about the St Patrick's Day coincidence, but this shade of green has always been one of my favorites.  The green accounts for the word 'mint' in the name of the blanket.  Yeah, I'm one of those people who name their saddle blankets...

It is based on Chris Armstrong's O'odham pattern, which of course is named after the Southwest Indian tribe.  I think it's pronounced 'oh dam,' which is about what the creator says after struggling endlessly with a cross stitch blanket!  (Later:  it's pronounced "AW-thum" with very little 'h'.)  I can't quite account for why I'm spending time on a blanket when I should be working on silver, except that I had it in a kit box and could carry it with me anywhere I went.  It went to Tucson.  It went to Kansas City.  It got worked on in Philadelphia airport and in my mother-in-law's apartment.  The same cannot be said of engraving miniature silver.
I wanted to try something different on this blanket.  Normally cross stitch is done with a cross, that is, for each square of the foundation there are two crossing strands of floss.  For this one, I chose to consider half a square to be a square.  That is, two holes in the foundation (the Aida cloth) made a square, and got covered with one pass of floss.  I wanted to make it easier.  I also wanted to create in miniature a certain texture that I thought would work well, as a saddle blanket.  I am reasonably pleased with the results.
This is the paper copy of the pattern I carried around in my kit box.  You see, I changed all the colors.  Apparently I'm incapable of NOT tinkering with a project or pattern!!  The little drawing shows how I do the corners, and that I expanded the original 49-squares to 50-squares, to make the pattern come out right.  I fold over the Aida edges to make the edge of the blanket, and just stitch them right in, along with everything else.  At the finish, I whipstitch the binding on with 2/6 strand floss.  This gives a fantastic, ultra-refined look to the blanket, almost too refined to be in scale with the rest of it -- dancing on the edge of breaking this basic rule of tackmaking.  However, it's a skill, and by now I've done it on a lot of my blankets, and it's a habit I want to keep.

This blanket will probably go out with D. Feldman's saddle.  Meanwhile, I'm happily testing it on a certain red-chestnut Leopard Appaloosa.  :)

On to the Sneak Peeks!
While in Kansas City, dealing with the wrenching problems of caregiving at a great distance, I started the rein bases to the Goehring set.  I am quite happy with how the textures came out.  I am slightly less happy with how twisted they appear.  Perhaps the buttons will disguise this to some extent.
This is the "Rein Plan."  I seem to have reached a point where all special order braidwork pieces have a drawing of their own.  This one is unfinished at the moment, since I haven't done the research (assigned a formula) for the 'crazy' (zigzag) buttons.  Also, the reins should wait upon the breastcollar.  The good news is work on it is starting up again.  The bad news is most of my days are taken up with other issues.
Thanks for your patience!