Saturday, August 23, 2014

TSII #452: Schmidt's Celtic Cutter II

This post is devoted to a single saddle.  Since this blog started, (Dec. 2012), there haven't been a lot of these, but it's my hope to change that!  And this is a pretty special piece, since it's got some new aspects -- things I've never done before.  Previous posts cover the bridle and breastcollar.
Every finished TSII saddle gets its own photo shoot, usually on the railing of the deck, if it's not winter.
 Amazingly the wood is not terribly mossy.  But the background is somewhat distracting to the fine braiding.  Still, tradition rules, so we start with the horse the set was built off of, the customer's requested mold, which is thus most closely identified with it ever after in my eyes (and records).  This is my Breezing Dixie, named Gypsy Tintinnara, an Australian Aborigine name which refers to the stars of the Big Dipper.
The saddle, as mentioned in earlier posts, was crafted for A. Schmidt of Germany as one of our 15 winners of the 2009 TSII Tack Orders Lottery.  Nobody knew at the time that it would be my last Lottery, (at least for the foreseeable future).  She gave me a Lisa Bowring piece to base the bridle from:
and requested that the saddle be a copy of TSII #419, the Celtic Cutter.

If I say so myself, I am satisfied.

What's different about this set, that I haven't done before?  How does one distinguish one's four-hundred-and-fifty-second saddle?  Off the cuff, it's the blanket.  I haven't allowed myself to make one of my cross stitches before solely for a customer.  They take too much time.
The color scheme on this one asked unusually hard questions (a turquoise and dark brown bridle combined with a natural saddle?  are you nuts?) and my solution is unusually pretty, dare I admit.  It's not every set I get to control down to the level of the blanket stitching.  When I combined the 4 colors from the bridle (2 shades of blue, black and white) with my own choice of diagonally alternating stitching rows on saddle blankets, using a Chris Armstrong pattern (Rialto), I was astonished to discover it matched the interweaves on the flat braid.  Bingo!! 
I honestly didn't see that coming!
Another noteworthy aspect of this set is the bit.  I made it from a pair of corner plates that match the saddle's corner plates.  This is contrary to our normal practice of making bits from scratch... but I wanted to save time and effort (always worth pursuing) and it just seemed the right thing to do.  Yet more memorable aspects are the interior construction with the Fimo in the pommel (finally I'm comfortable with this), and the terrific rawhide oxbow stirrups, truly my best so far.  Doesn't mean I won't make better ones in the future!
I truly meant this set to be used on a horse with no red in him.  The original parameters of the order seemed to preclude that.  Imagine my surprise when I put it on Lady Phase and saw how nice it turned out.
This horse's dapples are the result of mold damage, in case you're wondering.
On a red appaloosa, TSII #452 is almost psychedelic.
 Here I was seeking a plainer background.  I didn't quite have it, but the chimney helped.  Along about here you can see I'm having a tough time accurately depicting the true color.
These shots are all PhotoShopped in one way or another.  This one isn't too bad, but look back at those Gypsy ones!
Here's a non-red ISH:
 
And here's a horse I think gives the most accurate color of all, a white gray.
In conclusion, I am well pleased with the coordination of bridle, breastcollar, blanket and saddle.  It opens many possibilities for color combination work. 
 
But the best part is -- I actually finished a saddle!!  The second saddle to be finished in a year -- this hasn't happened since 2008!!  Thank you so much for your patience.  Here's hoping such a pleasant precedent can be extended to three... or who knows, even more.

Matinee Idol: Pink vs. Black

Everybody knows Stone's Matinee Idol came in two versions, pink hoof and black hoof.  But why?  Which is rarer?  Is there any real difference between them?  A friend gave me her Matinee Idol to sell (as of this writing he is still up for grabs), and I took the opportunity to do a side-by-side photo shoot.  I also did a little research, because I'm curious myself.
My own Matinee Idol, seen here on the left, has been with me since the original year of release, 1999.  She was my first ISH (Ideal Stock Horse).  (Note: some of my horses are sexed by character not body.)  Given that my ISH collection has swelled to over 25, you might logically conclude that I fell in love with the mold.  Me and just about every other model Western performance horse shower!  I will restrain myself to Matinee Idol here, and mention in passing that this sculpture was originally a portrait of Zan Parr Bar (1974-1987), the very famous Quarter Horse stallion.  Nineteen-ninety-nine was the year the ISH first appeared in plastic.
The first and most obvious difference between the black and pink hoof versions is the color of the head.  The pink one has a much redder head.  Of these 3 pictures, the top one shows this difference  best.  Despite what that shot looks like, neither horse is glossy.  Matinee Idol appears a sort of semi-gloss, something Stone Company could do to perfection at the time.
Despite seeing various references to "skunk," I have never seen any Matinee Idol without a dorsal stripe.
My memory is that I first heard about this model at BreyerFest 1999 (July 30, 31, and August 1), and promptly mail-ordered one.  West Coast Model Jamboree took place that year from August 25 to 29th.  The Jamboree was Sheryl Leisure's heroic effort to bring a BreyerFest-like event to the West Coast.  The special run, described as a Silver Grullo Pinto, was being offered at an advance-discount total price of $47.95 for pick-up at show.  My copy of the Jamboree bulletin claims that straight mail orders were not being accepted.  My own records for my horse reveal what I did:  mailed Sheryl a check on July 6 (!) and took delivery, via my dealer friend Nancy Fowkes of Spotted Horse Ranch, on August 30, for a pick-up fee.  So much for my memory.  I must have gotten an ad in the mail in June, and first seen the ISH at BFest.

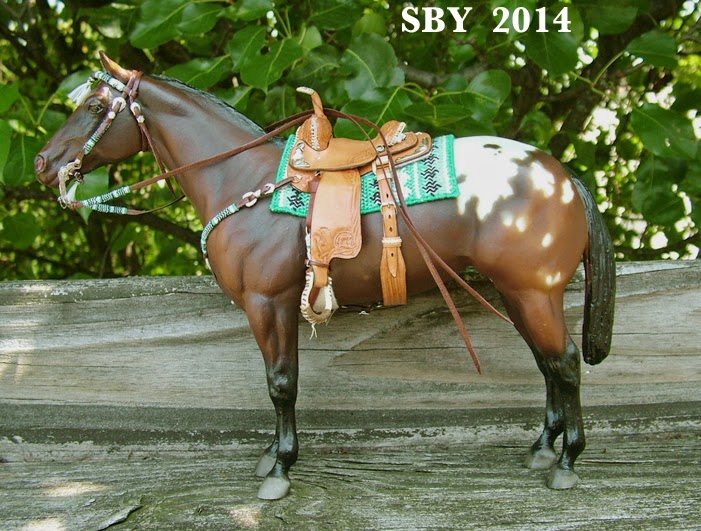
(And so much for my photography skills:  please excuse the moccasins!)  Black is on the right here.  And black was the color of my true love's hooves, at least in the rear.  Naturally, I thought all Matinee Idols had black hooves.... even though the press release clearly showed pink.
In addition to the face color, I can detect a different body color.  The black hoof version is more golden, the pink more yellow.  The variation is slight, and does not always show in these shots.  But scroll up to my first two shots (look rapidly from shoulder to shoulder), and compare some indoor ones.
I'm always learning how difficult it is to get digital cameras and computers to depict reality!  But take my word for it:  the pink hoof horse is a lighter, brighter, more yellow tone, whilst the black hoof's body color has just a scoosh more red-brown, making a darker golden.
Not by much!  But it's there.
All of which leads me to conclude that there really were two different batches made.

It is impossible to deny that pink came first.  My earliest printed references, the 1999 Jamboree ads (and the card that came with my horse), show pink.  Keri Okie's great standard Stone Horse Reference book, published in 2006, merely states "Known variation" for the model number 9967.  Eight hundred horses were made for the Jamboree.
 This is the card, and curiously it shows a number, 613.   I cannot explain this.
Go online to stonehorseref.com and the model number changes to SR1999, but: surprise!  the release number swells to 900.  And here we have a clue.  Could it be that the popularity of this run was so great that 800 was not enough, and someone at Stone hastily painted another 100?  this time with black hind hooves?  in time to fill the orders received before the Jamboree, viz., my own?

This theory is borne out by checking Model Horse $ales Pages for a random sampling of Matinee Idols.  There are 8 currently for sale, but only 2 are the black hoof version.  Four to one:  just what you'd expect in a random sample reflecting eight to one!  A sampling of current eBay reveals five to one.  Ahah.  I thought claims of "rare" and "only a few" black hoofs were typical sales patter; but it looks like they just might be true.
My own Matinee Idol is much too special ever to let go, (at least until one's final dispersal).  She is the leader queen of my ISH herd, veteran of many pieces of TSII tack built, and the one who offered her life when I was needing a scapegoat sacrifice-horse in 2010.  This dramatic story will have to wait until another time and place; suffice to say, it's the pink for sale in this picture and not the black!
Happy Collecting.

Wednesday, August 13, 2014

Gypsy at Whipple Dam

 There is something about the deep green summer forest that is just irresistable, especially when you've got a good horse under you.  Gypsy has been with us for many years, and she's always been reliable.  A lot of tack has been made off this girl.

Timaru Star II Western Saddle #452 is finally finished, and someone absolutely had to bring the camera along when we visited Whipple Dam State Park.  This is a small recreational area around a mountain lake just big enough to go canoeing in, south of State College by half an hour.
My mother was visiting us last week, and we dragged her around to many local sights.  This was one of them.  I took advantage of the opportunity.  She drew flowers, my husband read a book, and I flopped down in the forest floor and tried to capture Gypsy Tintinnara and the new saddle.  With some success.
Sometimes the ground isn't exactly level...  you have to trust your horse to stand up to it!  A few more steps...
Rocks and ledges are nothing to her.  She will carry you through.  Me, alas, didn't want to get my knees and elbows too dirty...

Note that the saddle blanket is NOT #452's.  This saddle blanket is none other than the one to The Elk, #432.  It was the only one I had at the time that had dark brown and turquoise on it, and was near enough to what I had planned for this set.  Also, since these pictures were taken, the bit has been replaced.  More on that in another post.
Taking big trees in stride.
 Birds-eye view. 
Through the trees the lake appears.  It's not really that slanted...  It's just that one gets tipsy with all that grass and the good smells.
It's sooo good to be outside and moving around, healthy and happy.
And on this note we'll pause for a while.


Monday, August 4, 2014

TSII #452: Taking A Pommeling

Making the pommel of a Western saddle is one of the most challenging parts of the whole project.  TSII #452's pommel fought so hard and had to have so much work put in on it that I thought I would make a post of it.  It illustrates a phenomenon which is very interesting to me:  how, when and why to decide to destroy your own work.  My private phrase for it is "What does the Master do when things REALLY go wrong?!?"

But first, let's show the normal.  TSII #452's pommel is turned inside out and sewn together along both sides.  This is after any tooling, decorating or dyeing.
One side at a time, the pommel was turned back right side out.  This takes some skill with the fingertips, smoothing and pressing.
It had been so long since I'd made a Western saddle I'd sort of forgotten how to do it!  After cutting out this pommel, I decided I'd done something wrong.  More leather would be needed to cover up the underside, that is, the gullet.  I choose to add back on a piece, by first gluing on a splint (not visible here) and then applique-braiding the join.
This is absolutely the most work I've ever put in to redress a straight cut in leather.

The next order of business on TSII #452 was to add the gullet rim.  I don't use a tree, so the front rim has to be suggested by sewing on an arc of leather.  I've been doing this for years and anticipated no problems.
Had I but known it, this was one of the places where I went really wrong!!  Not in the rim itself, mind you... but in the placement of it -- !!
At the same time I was starting to get uneasy about those two cuts in the back of the pommel/shoulders.  Was the gullet bottom really going to be that high up?  What would cover the sides, which would now be open?  Did I know what I was doing?  Answer:  No!!

The previous applique-braid was so beautiful I decided to use it again.  Here those two cuts were closed back together again.
 And again, this is the MOST work I've ever done to recover from inadvertent cuts.  Shoulda remembered I hadn't done cuts like those enough to really remember their need or use!  I'm still evolving my pommel technique.  To stop in the middle of that evolution and not pick it up again for a year or so was part of what made this saddle such a challenge.
Here we can see the "splint" on the back side of the bottom, the inside of the joining applique-braid, the underside of the gullet rim, and what happens with the horn wires.  Quite a lot of information for one picture!

The next picture shows the three-strand applique used on the welt or shoulder seam of the pommel.  It also shows the beginnings of my REAL problem:  the rim is too low.  It does not stick out forward like it should.  Did I recognize this at the time?  Heh!
 The next picture shows my concentration on the braiding of the gullet rim.  This is one of the most challenging, yet beautiful, parts of the Western pommel.

I'm afraid several steps in the making of #452's pommel did not get covered.  Not shown:  the inside being stuffed with Fimo and baked.  This is an idea I got from another tackmaker.  It solves the problem of heft, that is, strength and weight.  Previously I'd used leather rolls, which tended to be hard to shape and did not lend weight. 
 In order to do the gullet rim braiding comfortably I went to the considerable trouble of taping the wire ends together, out of the way.  This picture shows the completed braiding.  It was done with a custom-made thread, 2/3rds + 2/3rds spun together, in Spanish Edge Braiding of 2 loops.  This is more or less standard for me.
Whole posts might be done on this step alone.  This close-up shot shows how I recovered from slant.  Slant is a common enemy of edge braiding on model saddles!
What a lot of trouble for a plain braided edge!  But worse was yet to come.  I have said some steps did not get photographed.  We have come to the point of my rant, but I don't have a picture of the destruction!  I only have before and after pix.  Before, the top of the gullet rim piece is below the tooled "vine" at the base of the horn.  After, it is on top of the vine.
I decided the rim was too low and did not project forward properly.  I had to completely remove all the front edge braiding and resew the rim.  All that work...  'snif'   This sort of thing happens more often than I care to admit.  All told my "accident percentage" ranges from 5% to 35%, with probably an average of around 20%.  The "destruction decision" is probably best made by artists confident in their ability to replace what is being destroyed.  If the vision is compelling, the only difficulty should be chagrin over the destruction.  My own solution is to "give it time" -- to intentionally get up and do something else for a while, and come back later, cold.  At that point it is much easier to just undo everything (for me unbraiding is usually swifter than braiding) and make sure the same string can be used again.  Fortunately in this case it was.  A pass with the wax and we were off and running.
As often happens, amazingly, the second time around was better!  The braid is more even and shows up better.  The leather which covered the bottom of the pommel had to be stretched rather severely... to its limit... but there was just enough to reach.
Many times this is how it works with an evolving, one-of-a-kind piece of tack.